Interchain Bounties Tutorial
This guide provides detailed information on how to use Interchain Bounties, including instructions on how to create and assign bounties
Create a Bounty
To deposit/withdraw IBC tokens on Gitopia devnet, please refer this guide
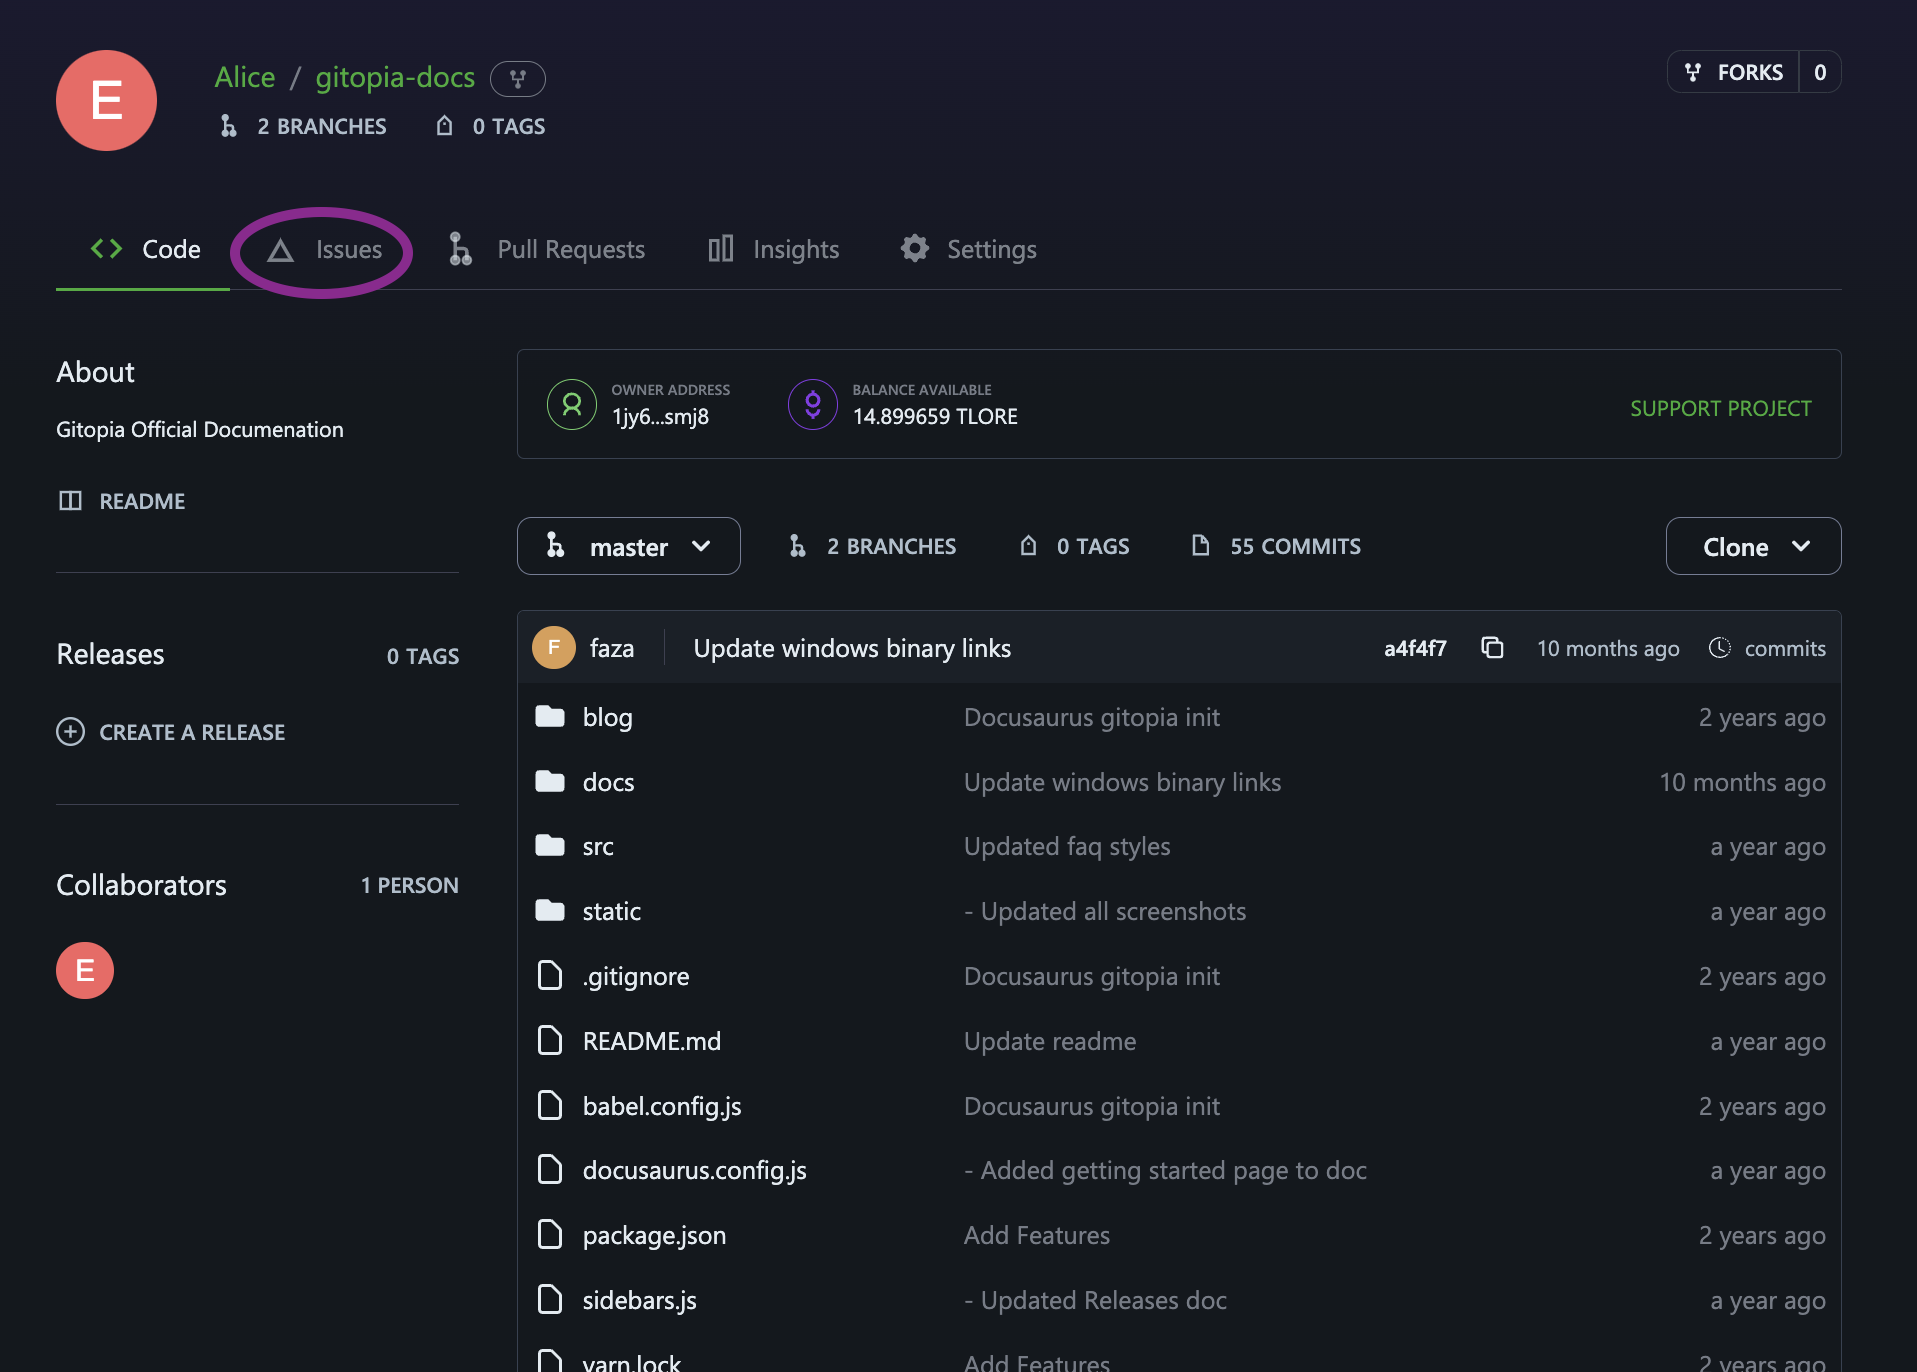
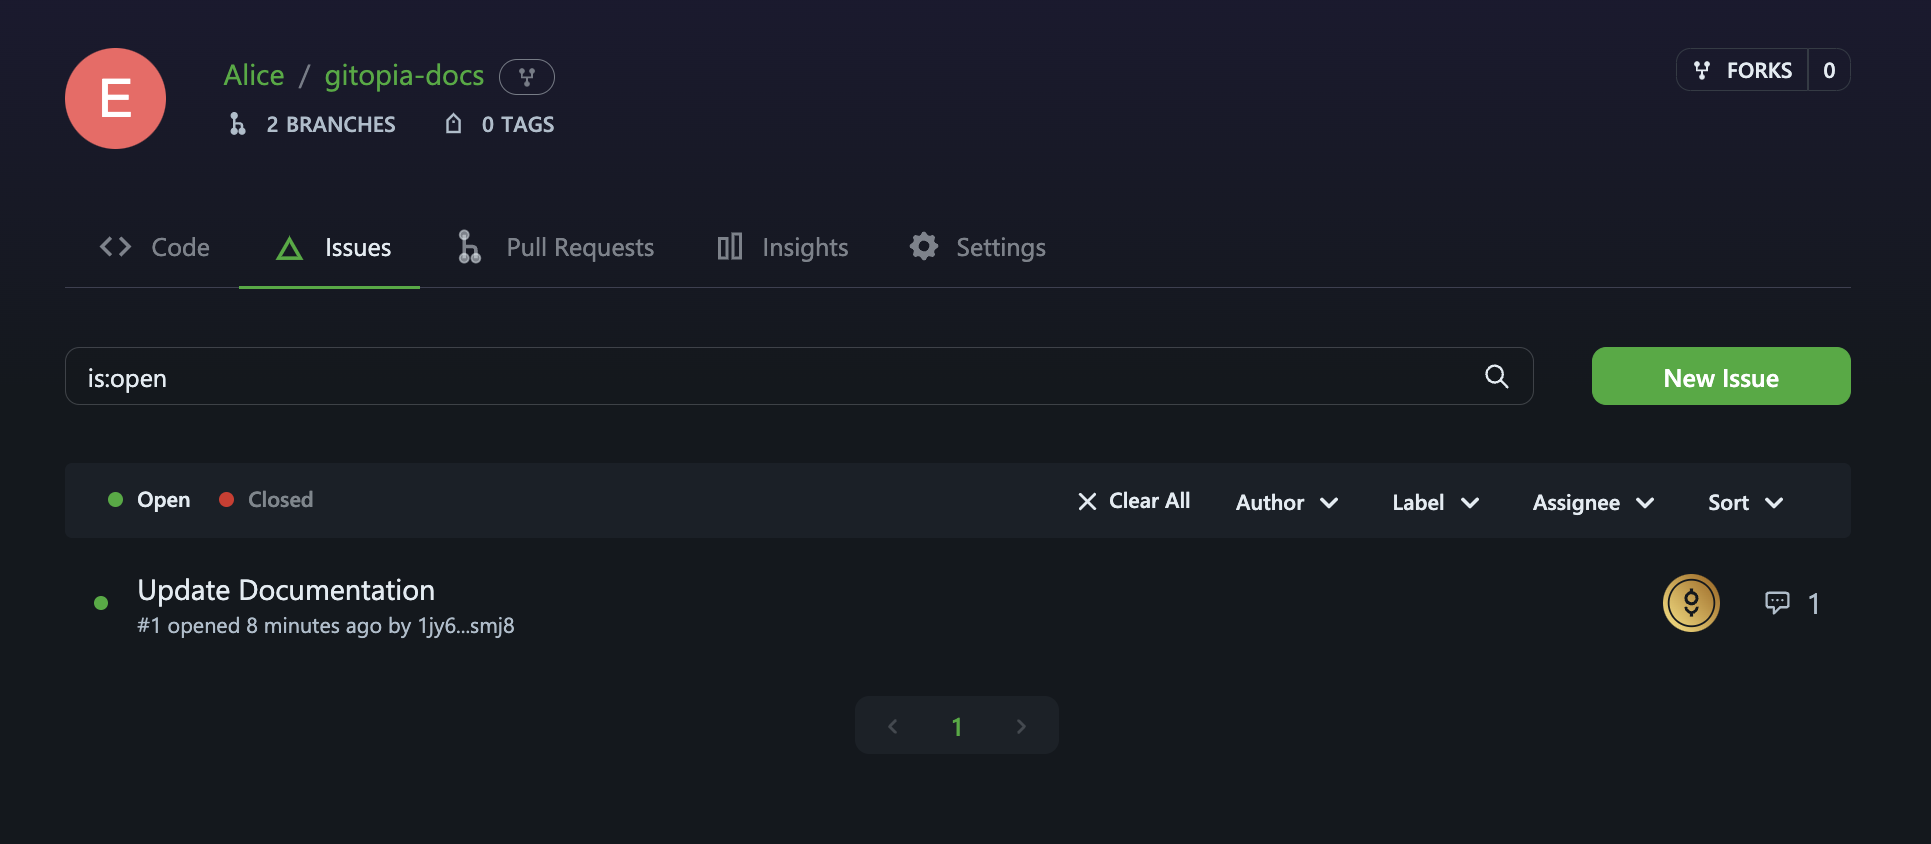
Step 1: Navigate to Repository Issues
To create an issue for a repository, first navigate to the main page of the repository and click on Issues under your repository name.
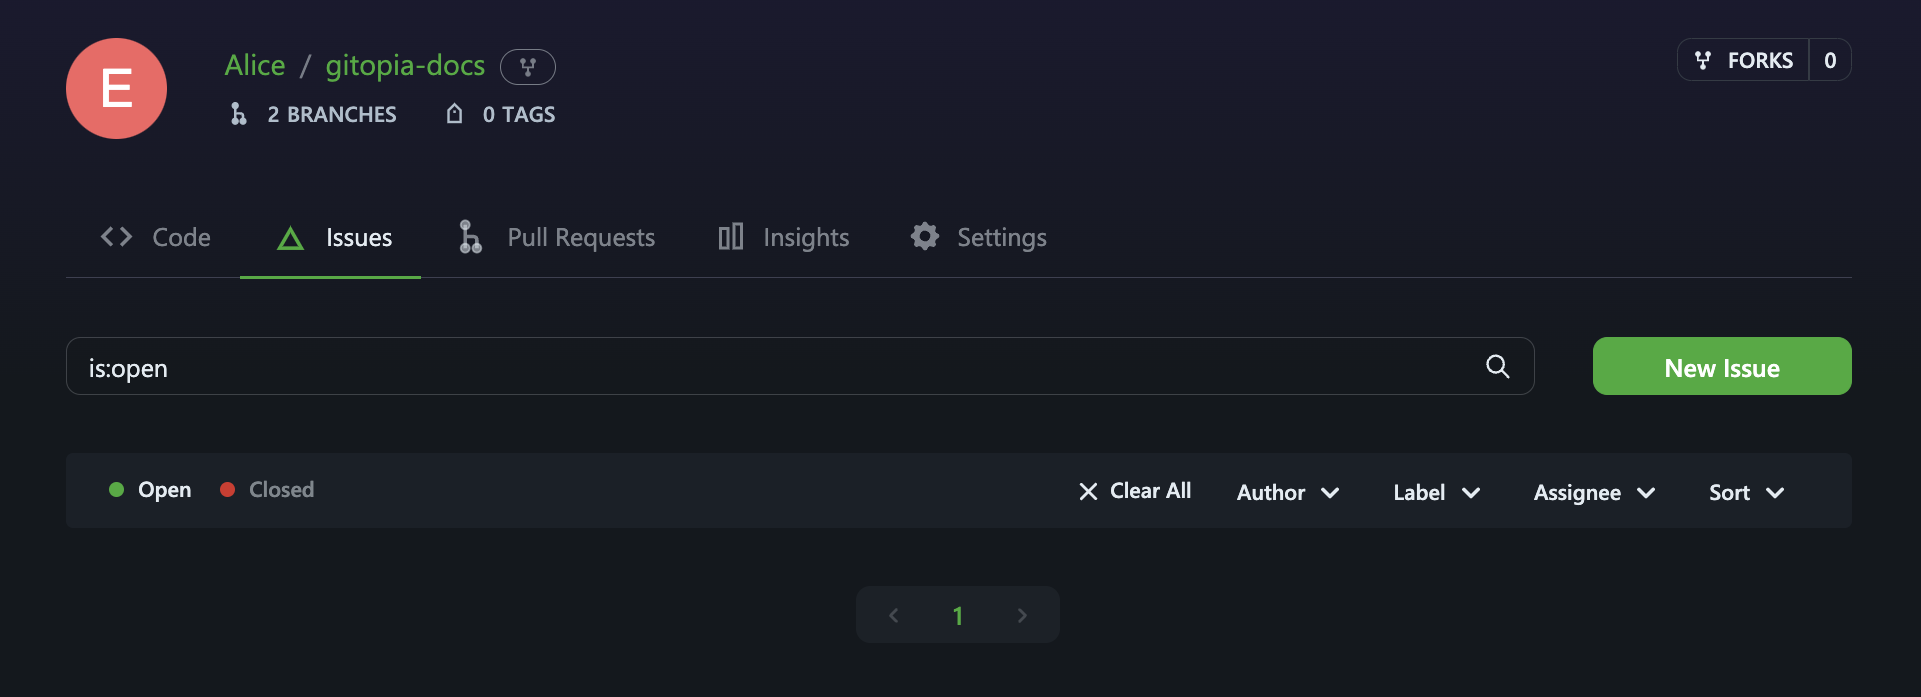
Step 2: Create a New Issue
On the resulting page, click on New Issue to create a new issue for the repository.
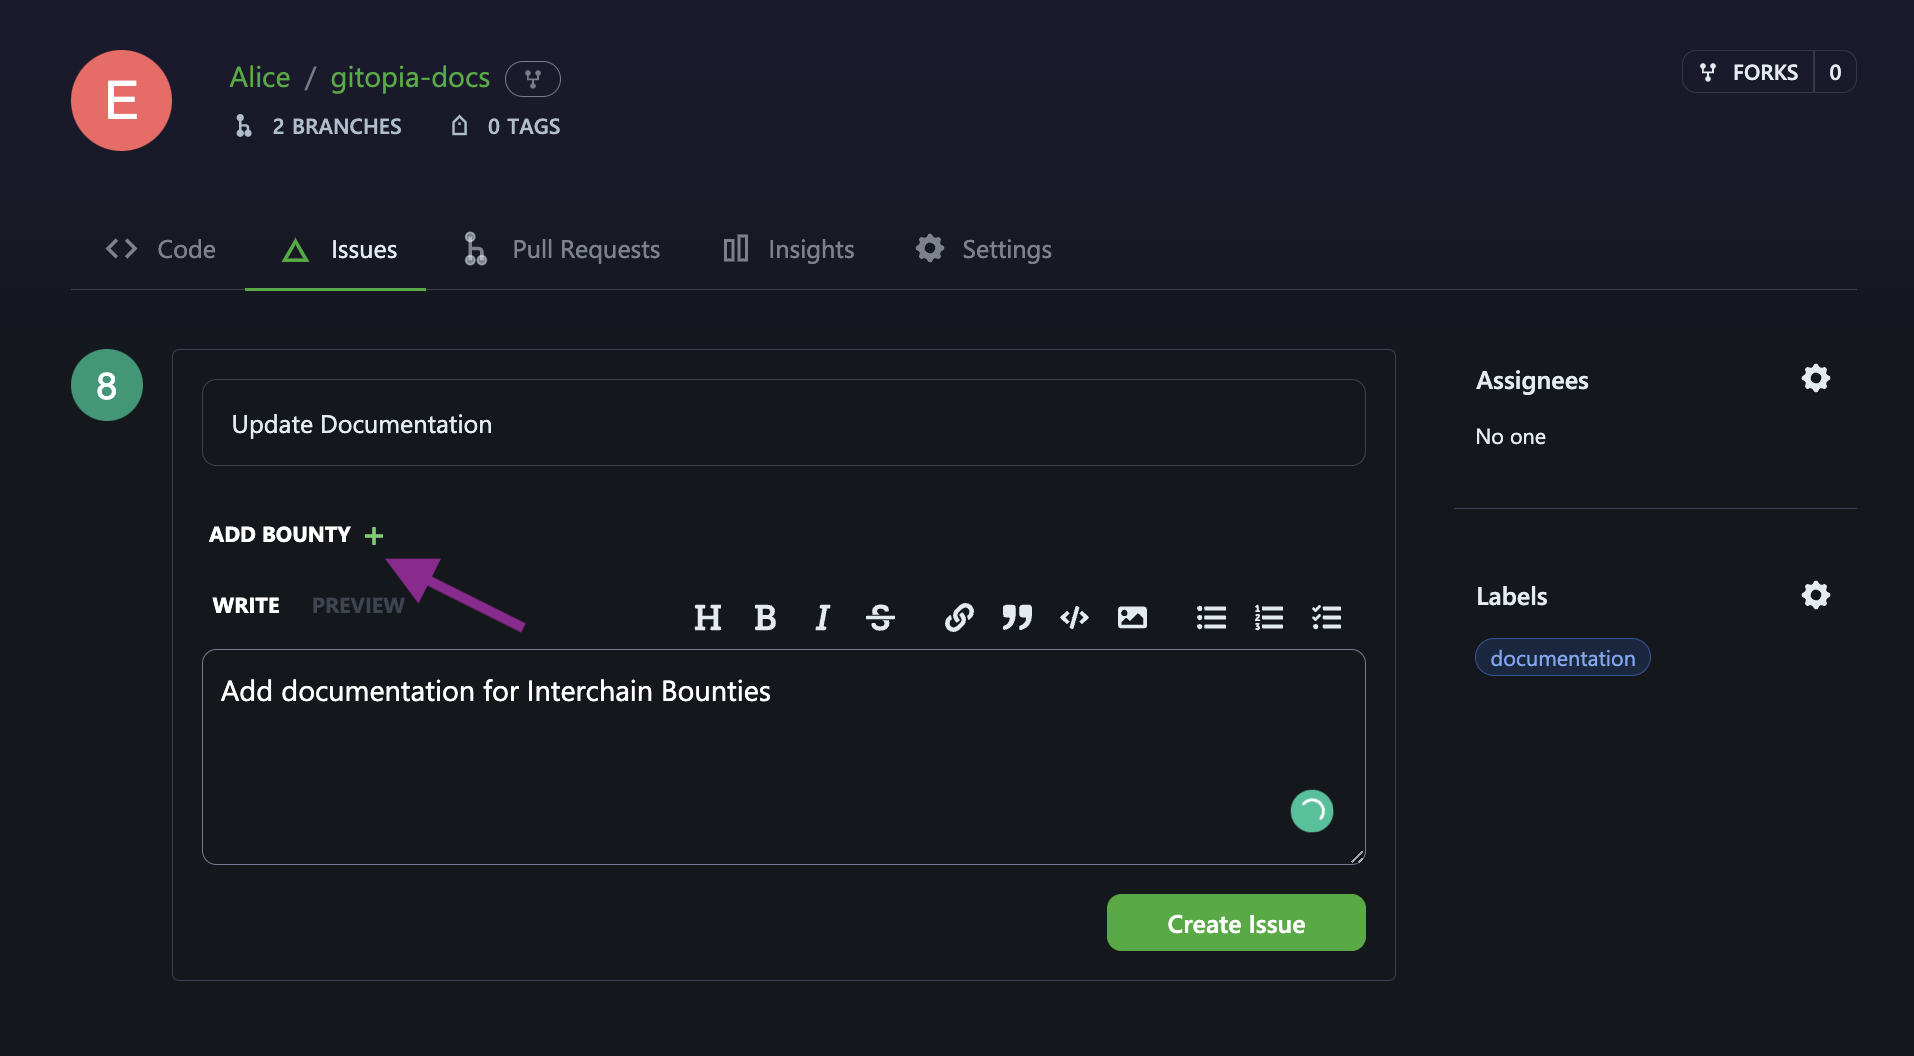
Step 3: Fill in the Details
Fill in the Title and Description for your issue.
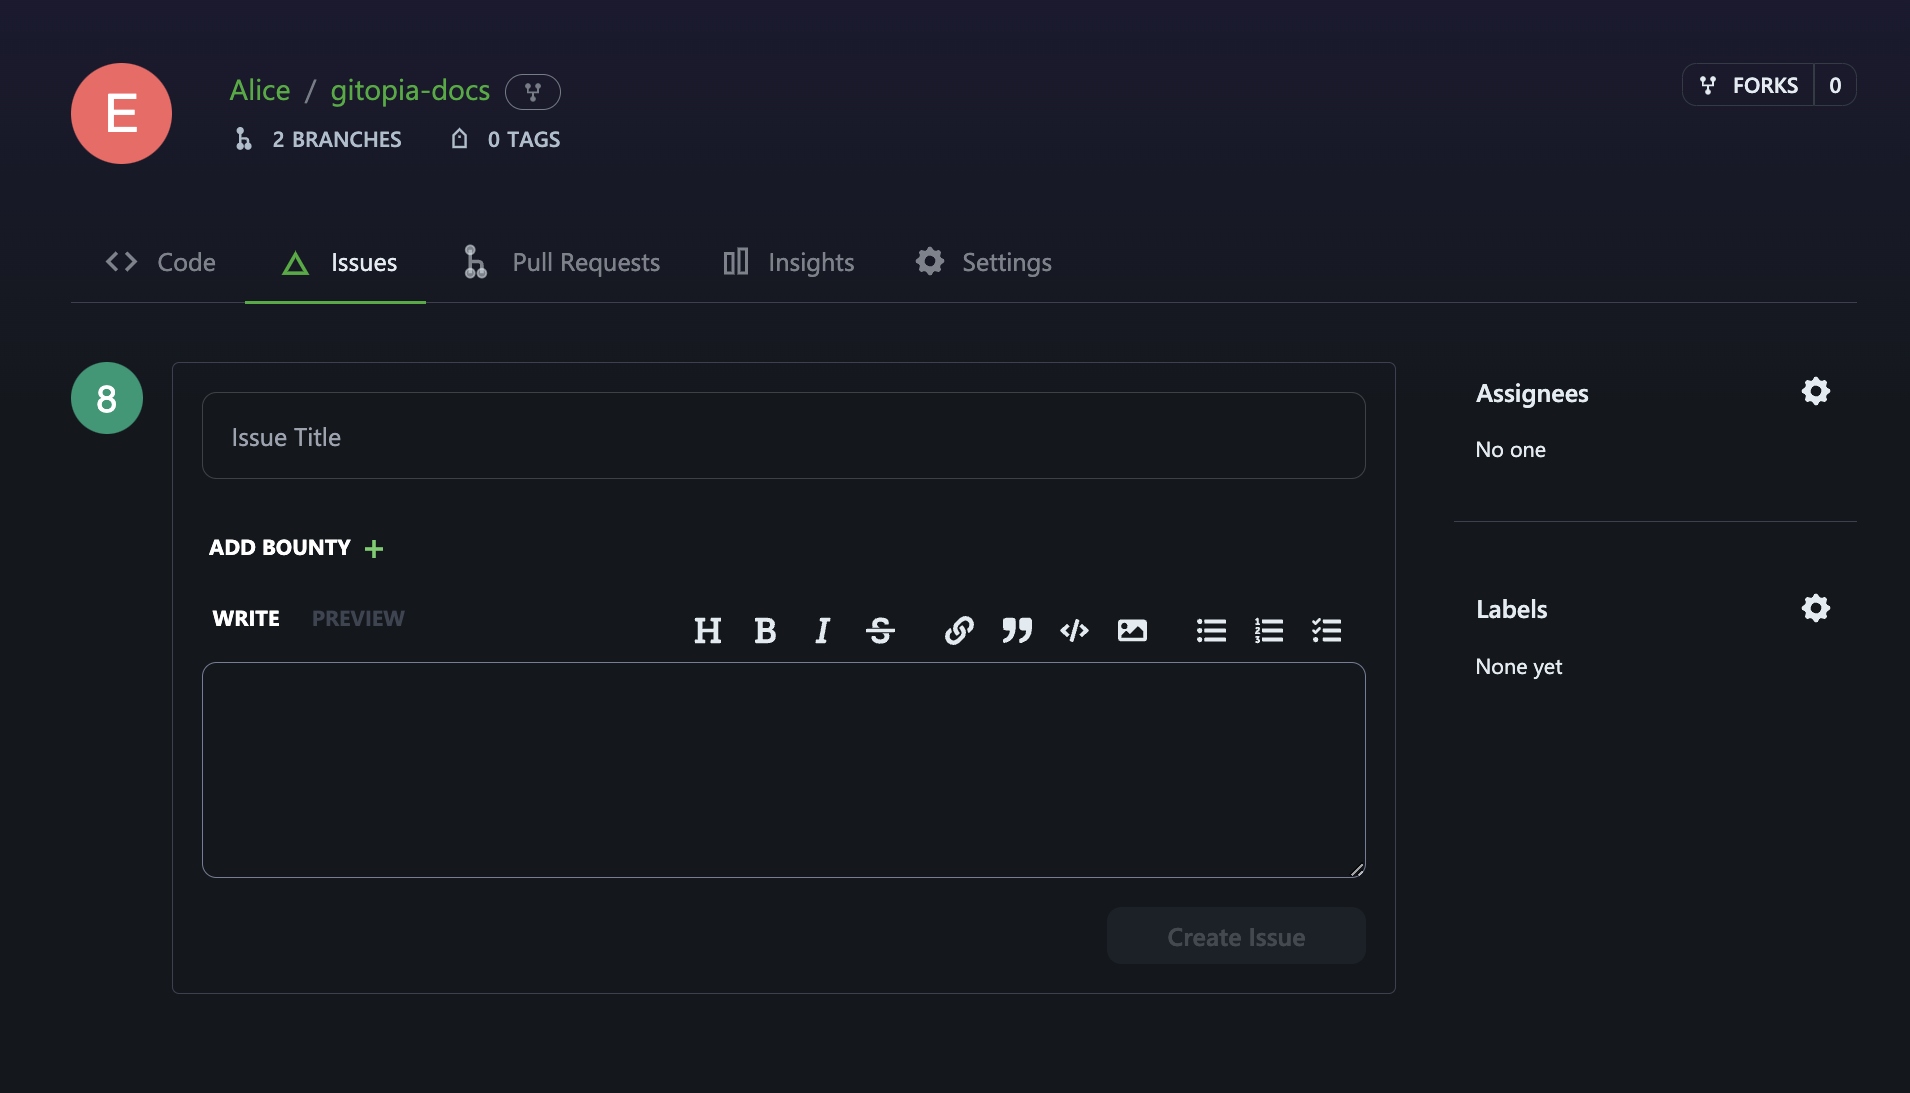
Step 4: Add Bounty
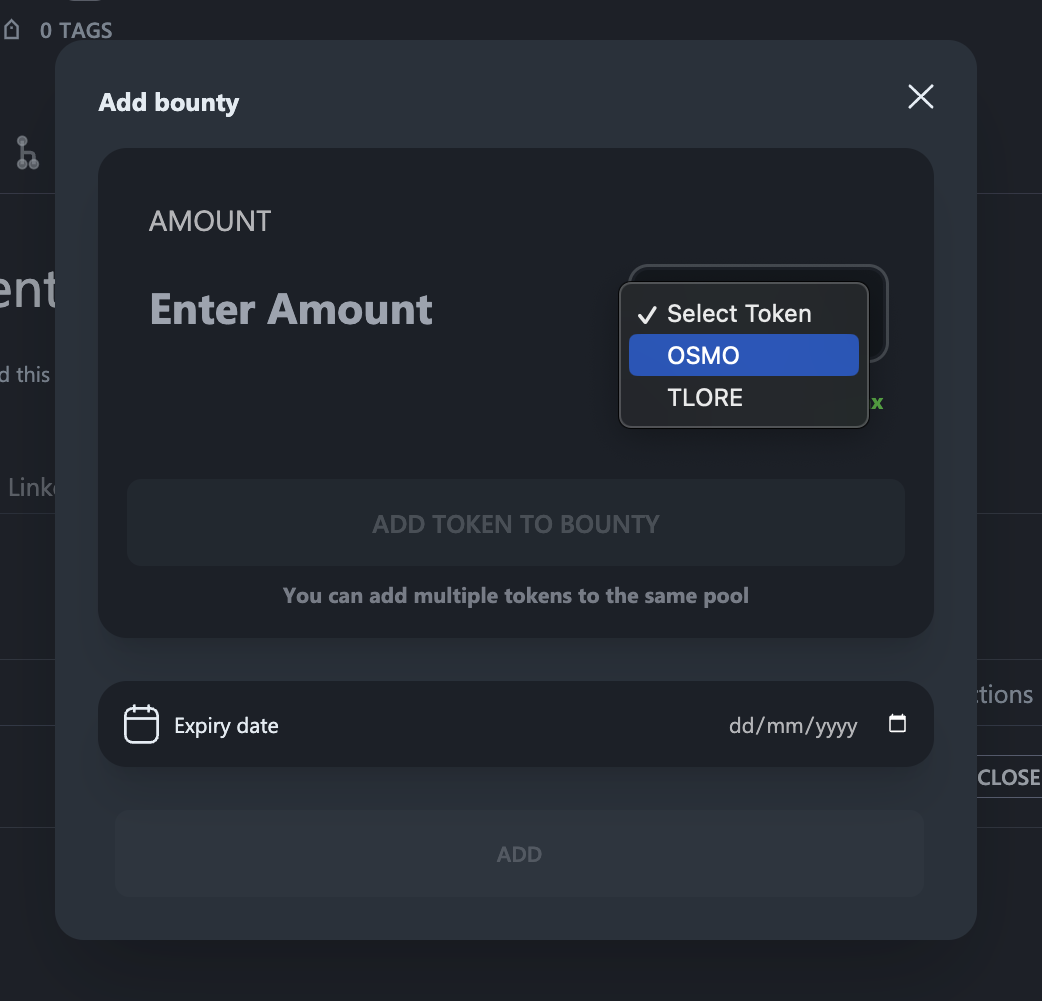
- Click on ADD BOUNTY. This will take you to the bounty creation dialog box.
- Now, select the token you want to use and enter the amount. When done click on ADD TOKEN TO BOUNTY. You can add multiple tokens if you want.
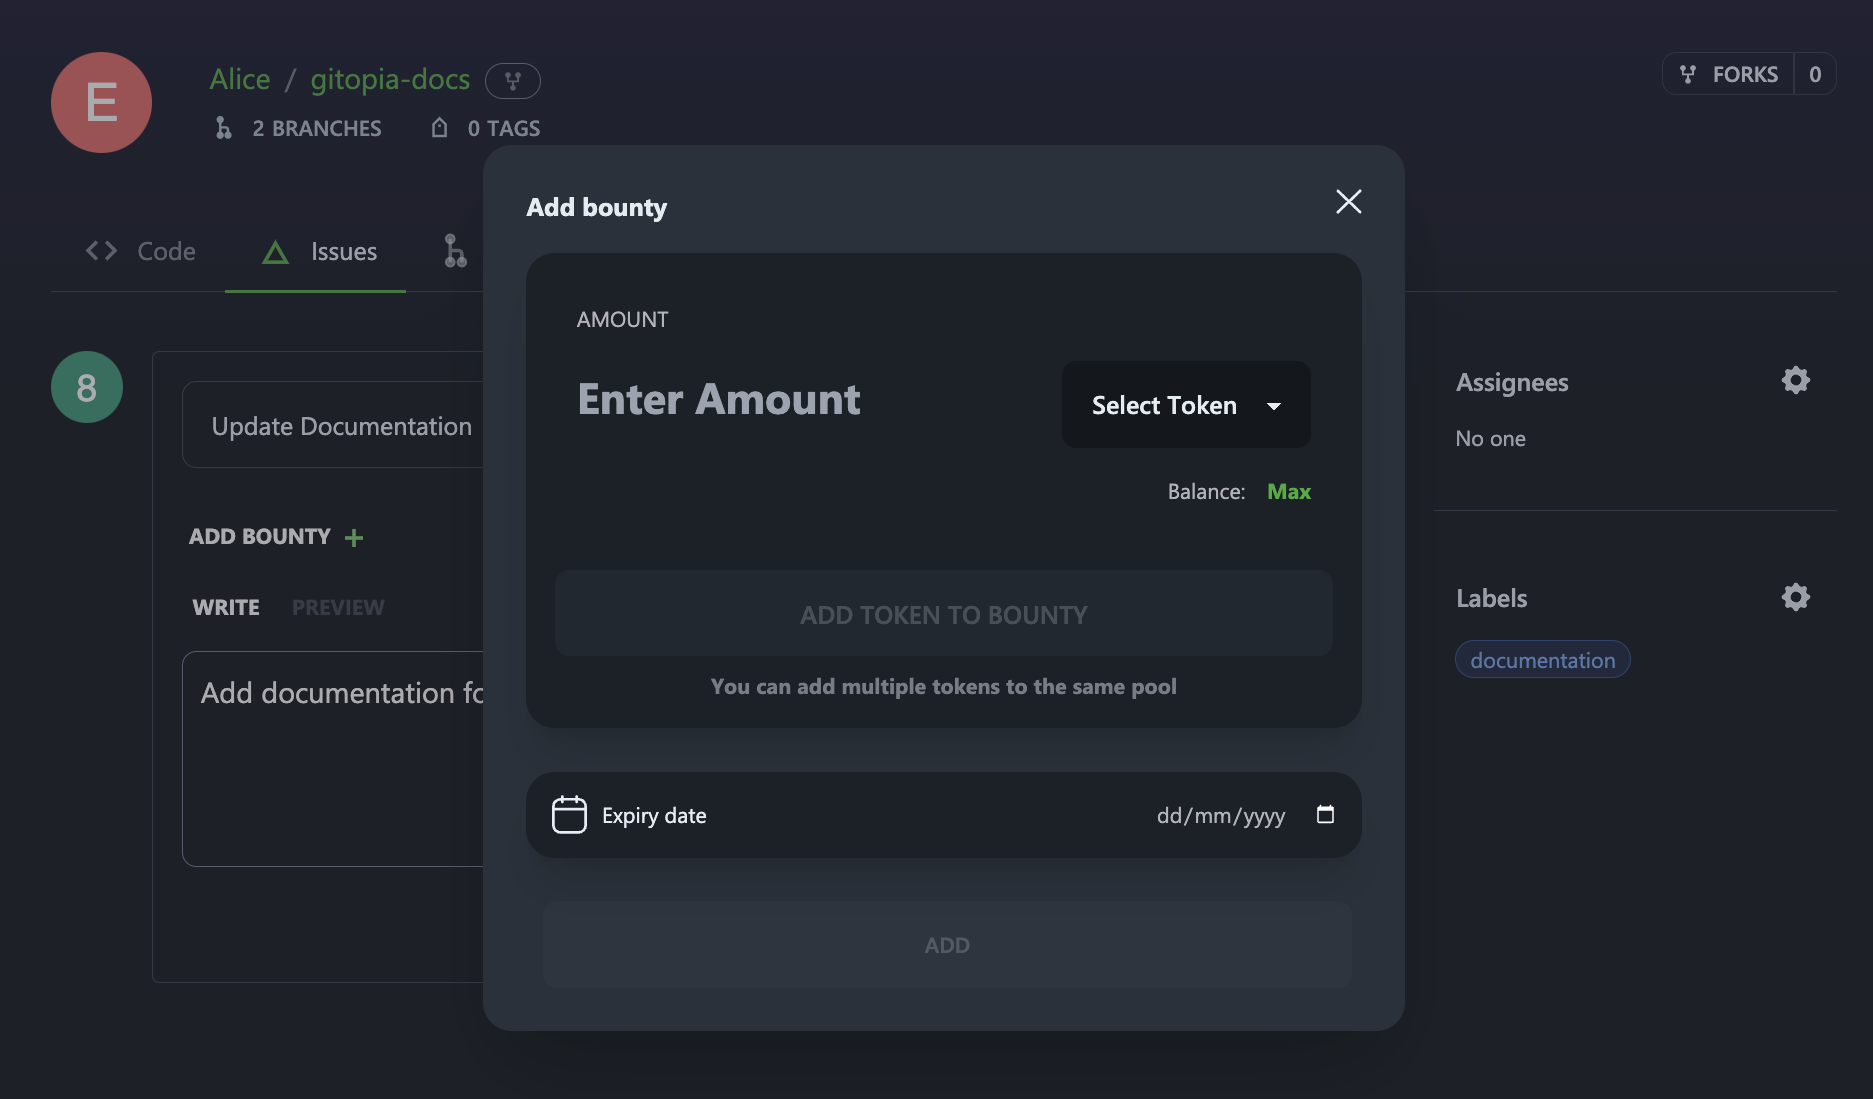
- Next, select an Expiry date for the bounty and when done, click on ADD to add the bounty to the issue.

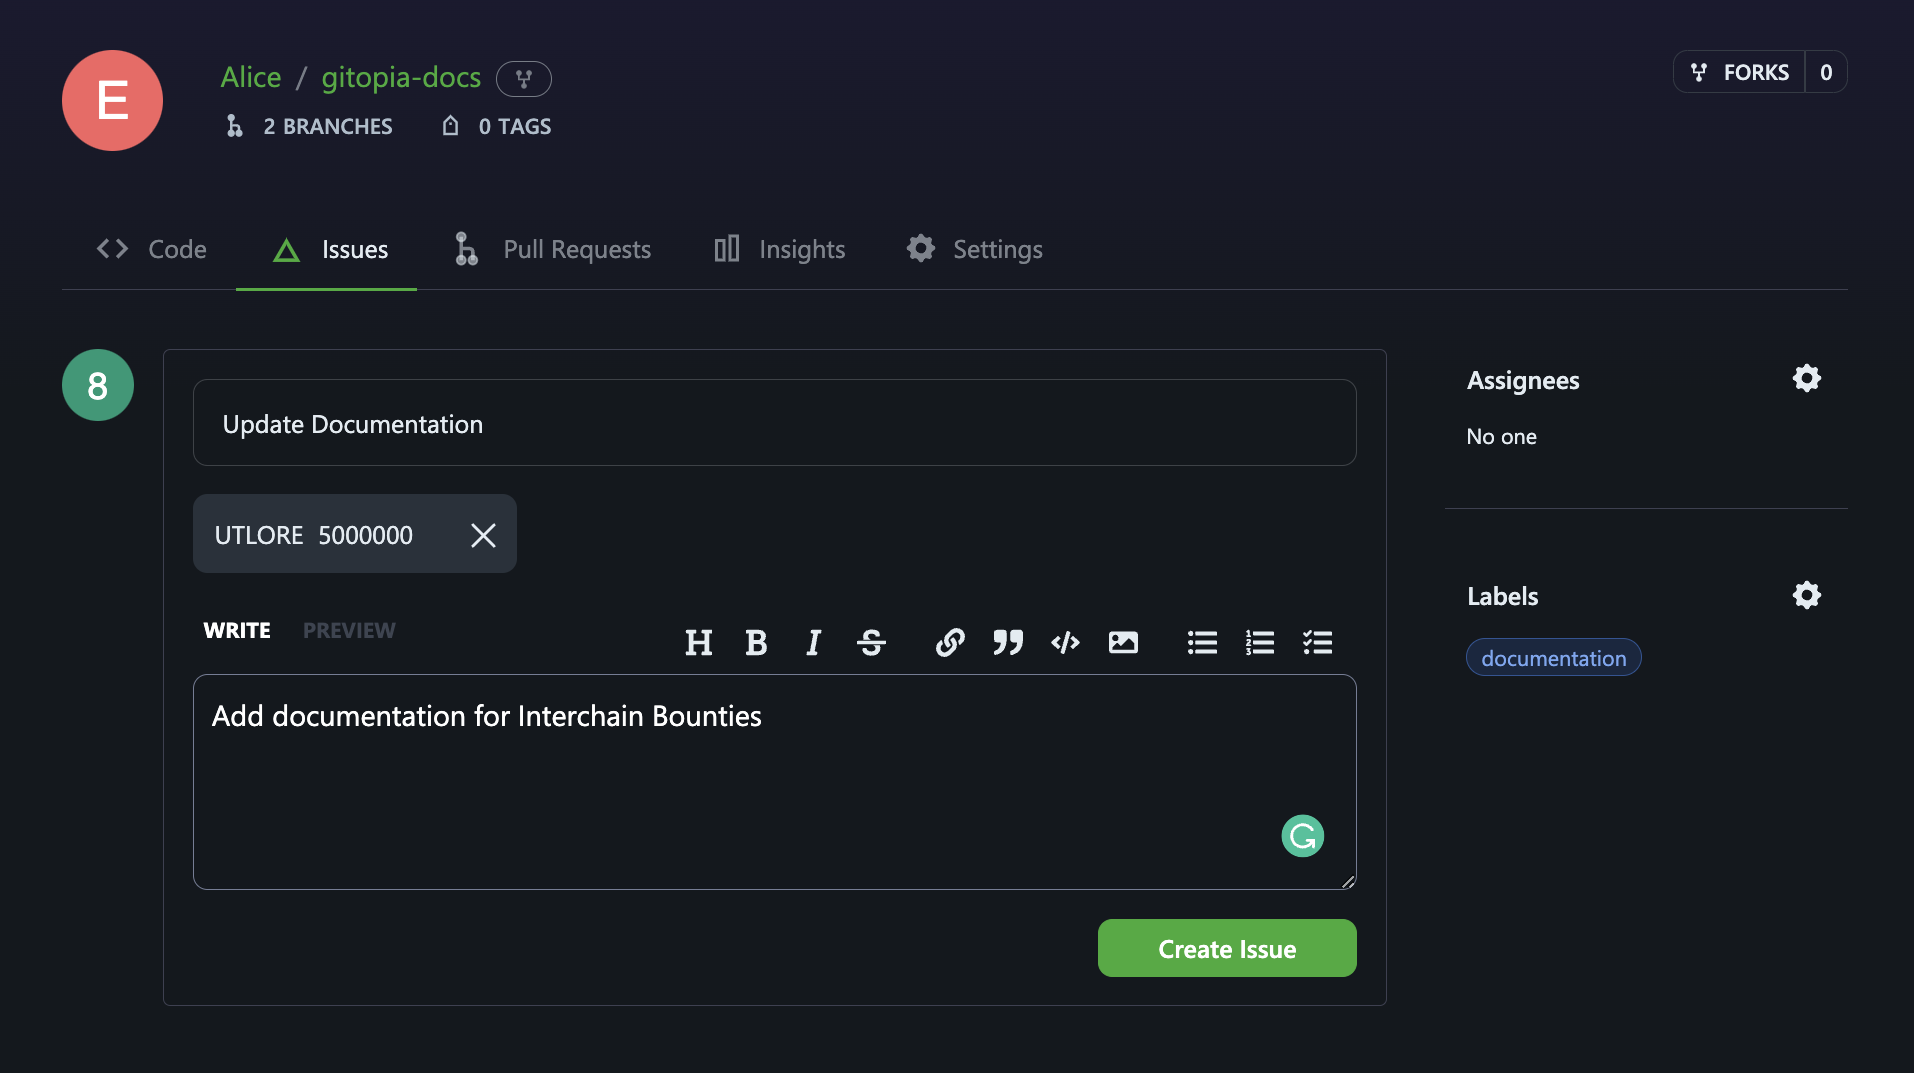
Step 5: Create Issue
A bounty has been added to your newly created issue. If you're a project maintainer, you can assign the issue to someone, or apply a label. When you're finished, click Create Issue.
In order for the bounty to be released to the contributor automatically, certain prerequisites must be met:
- The issue must be assigned to the contributor.
- The contributor's pull request must be linked to the issue before it is merged.
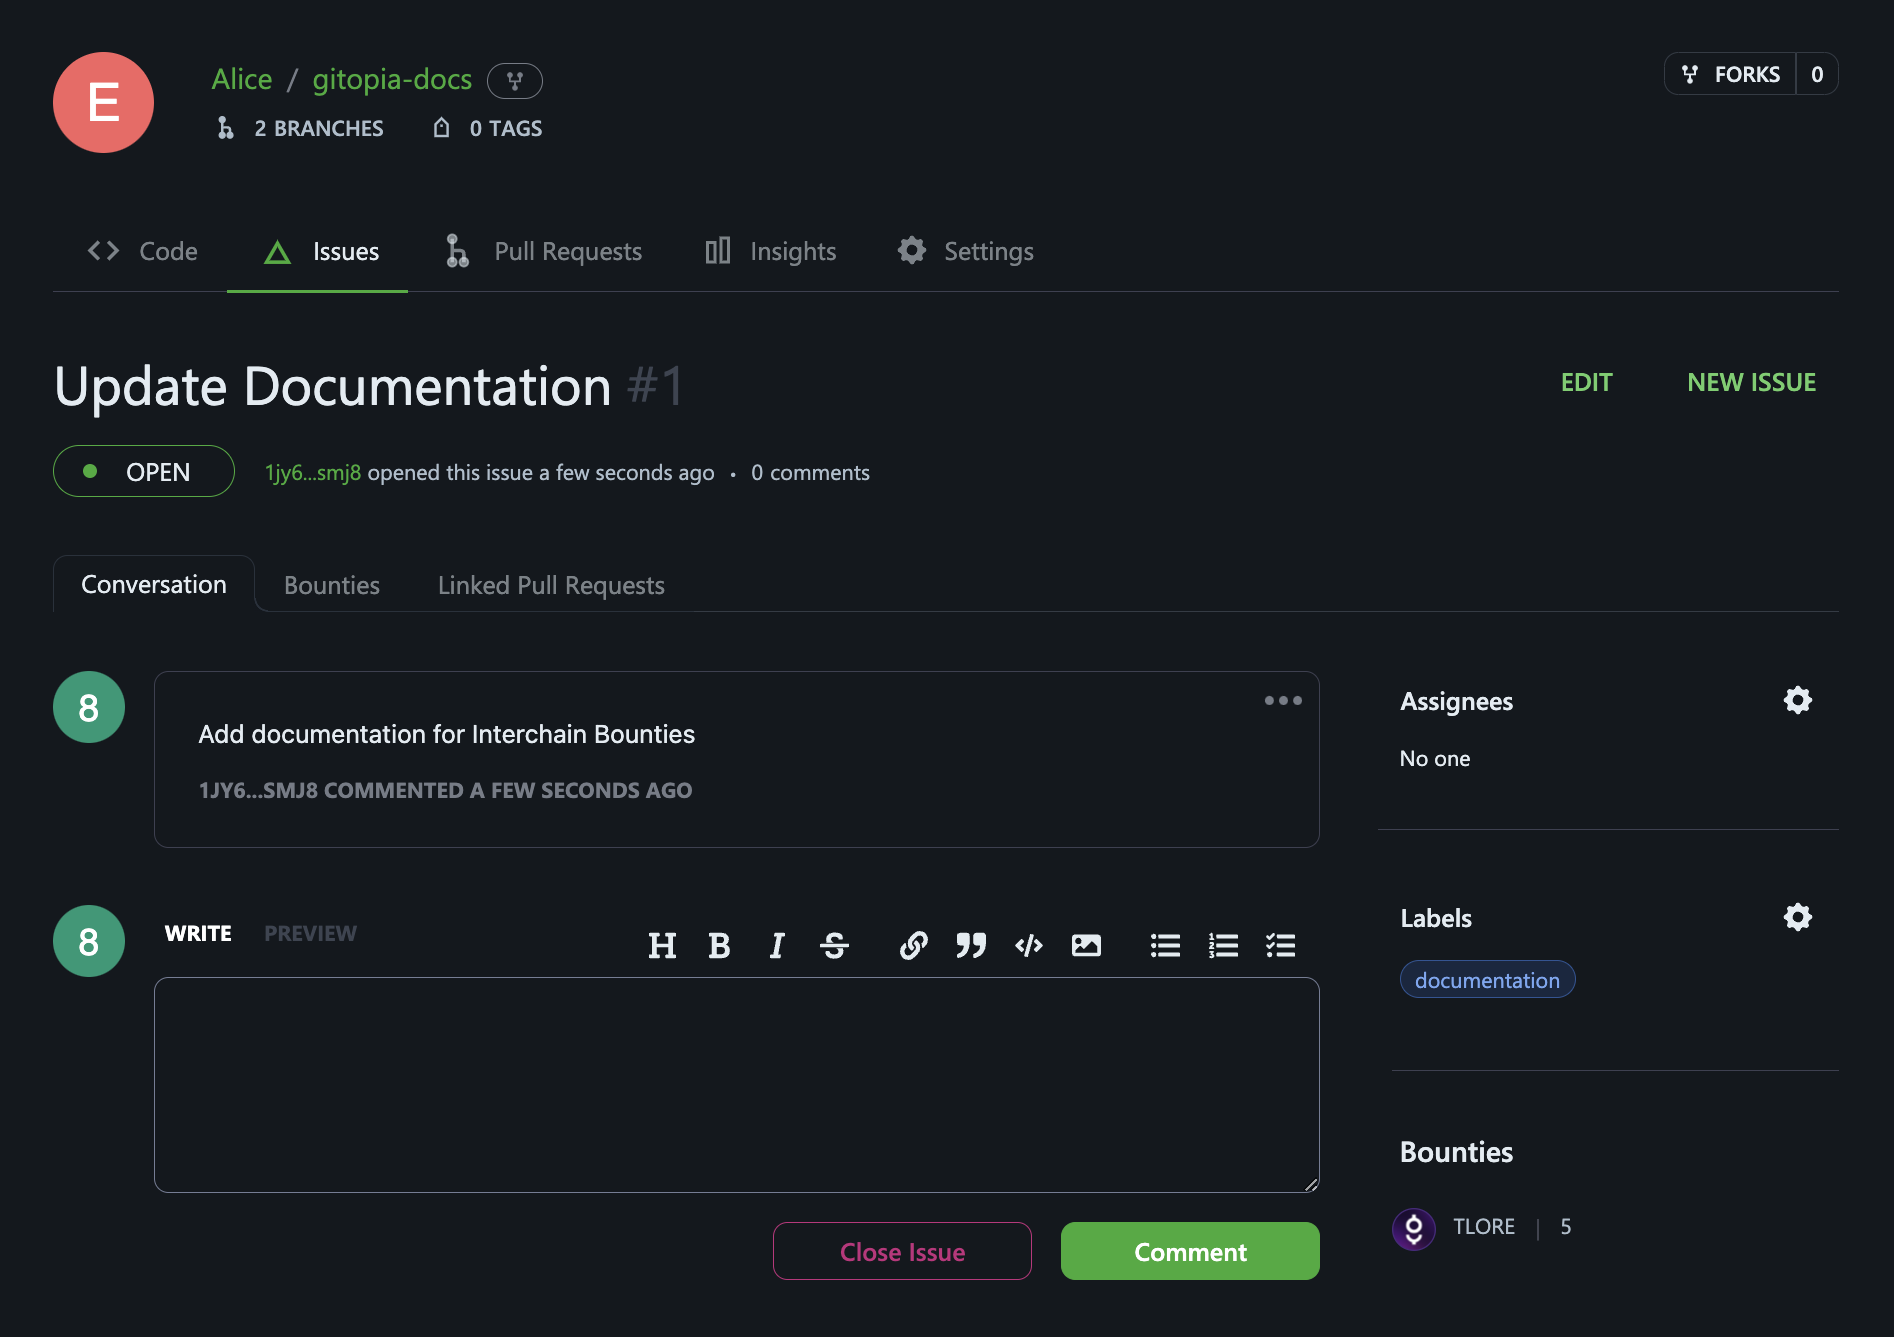
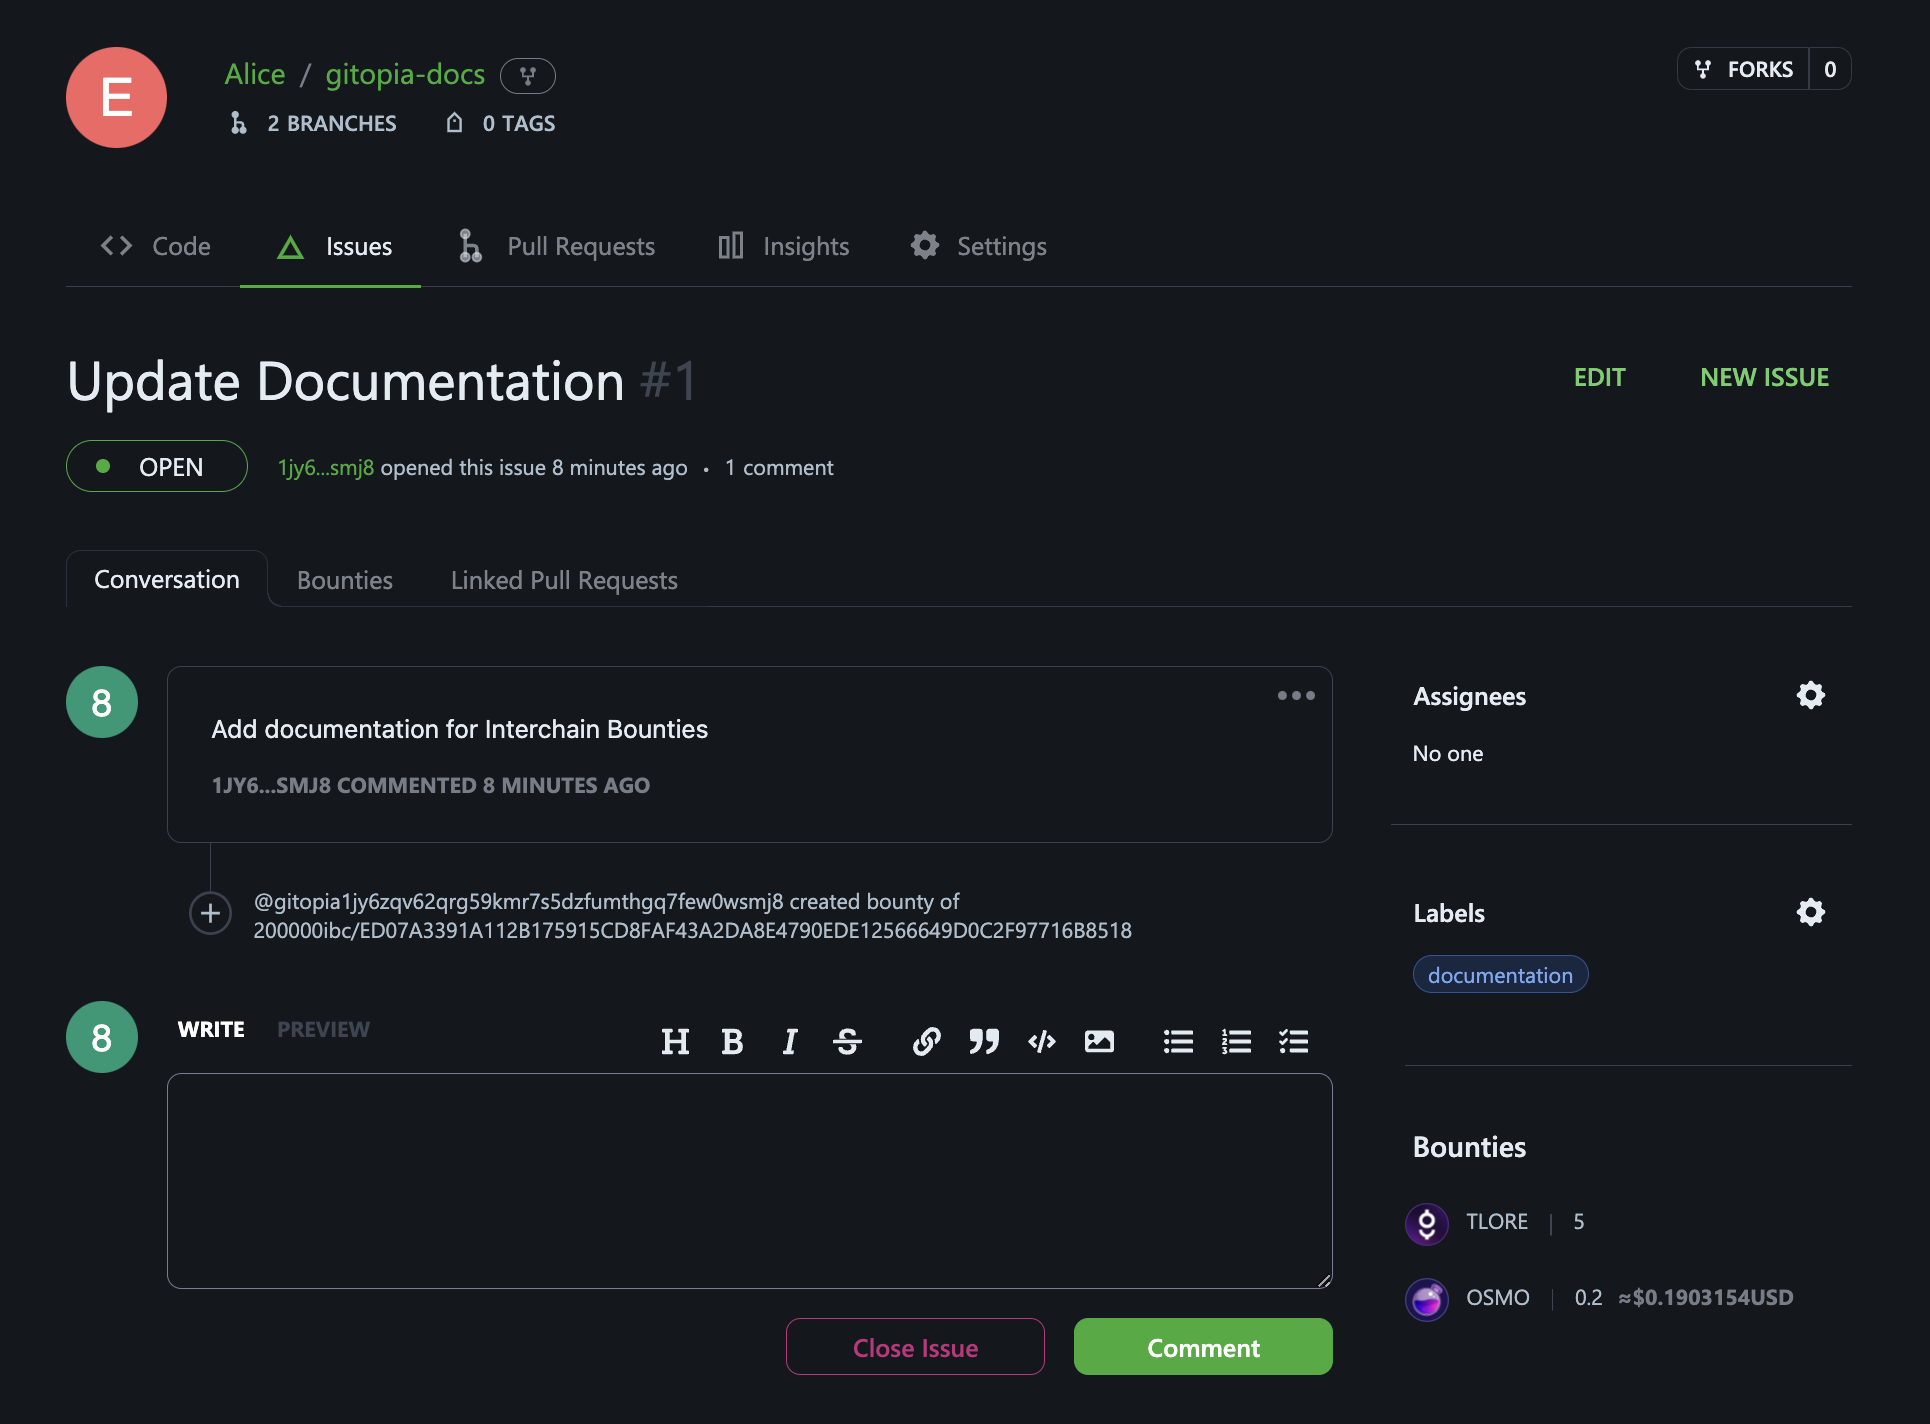
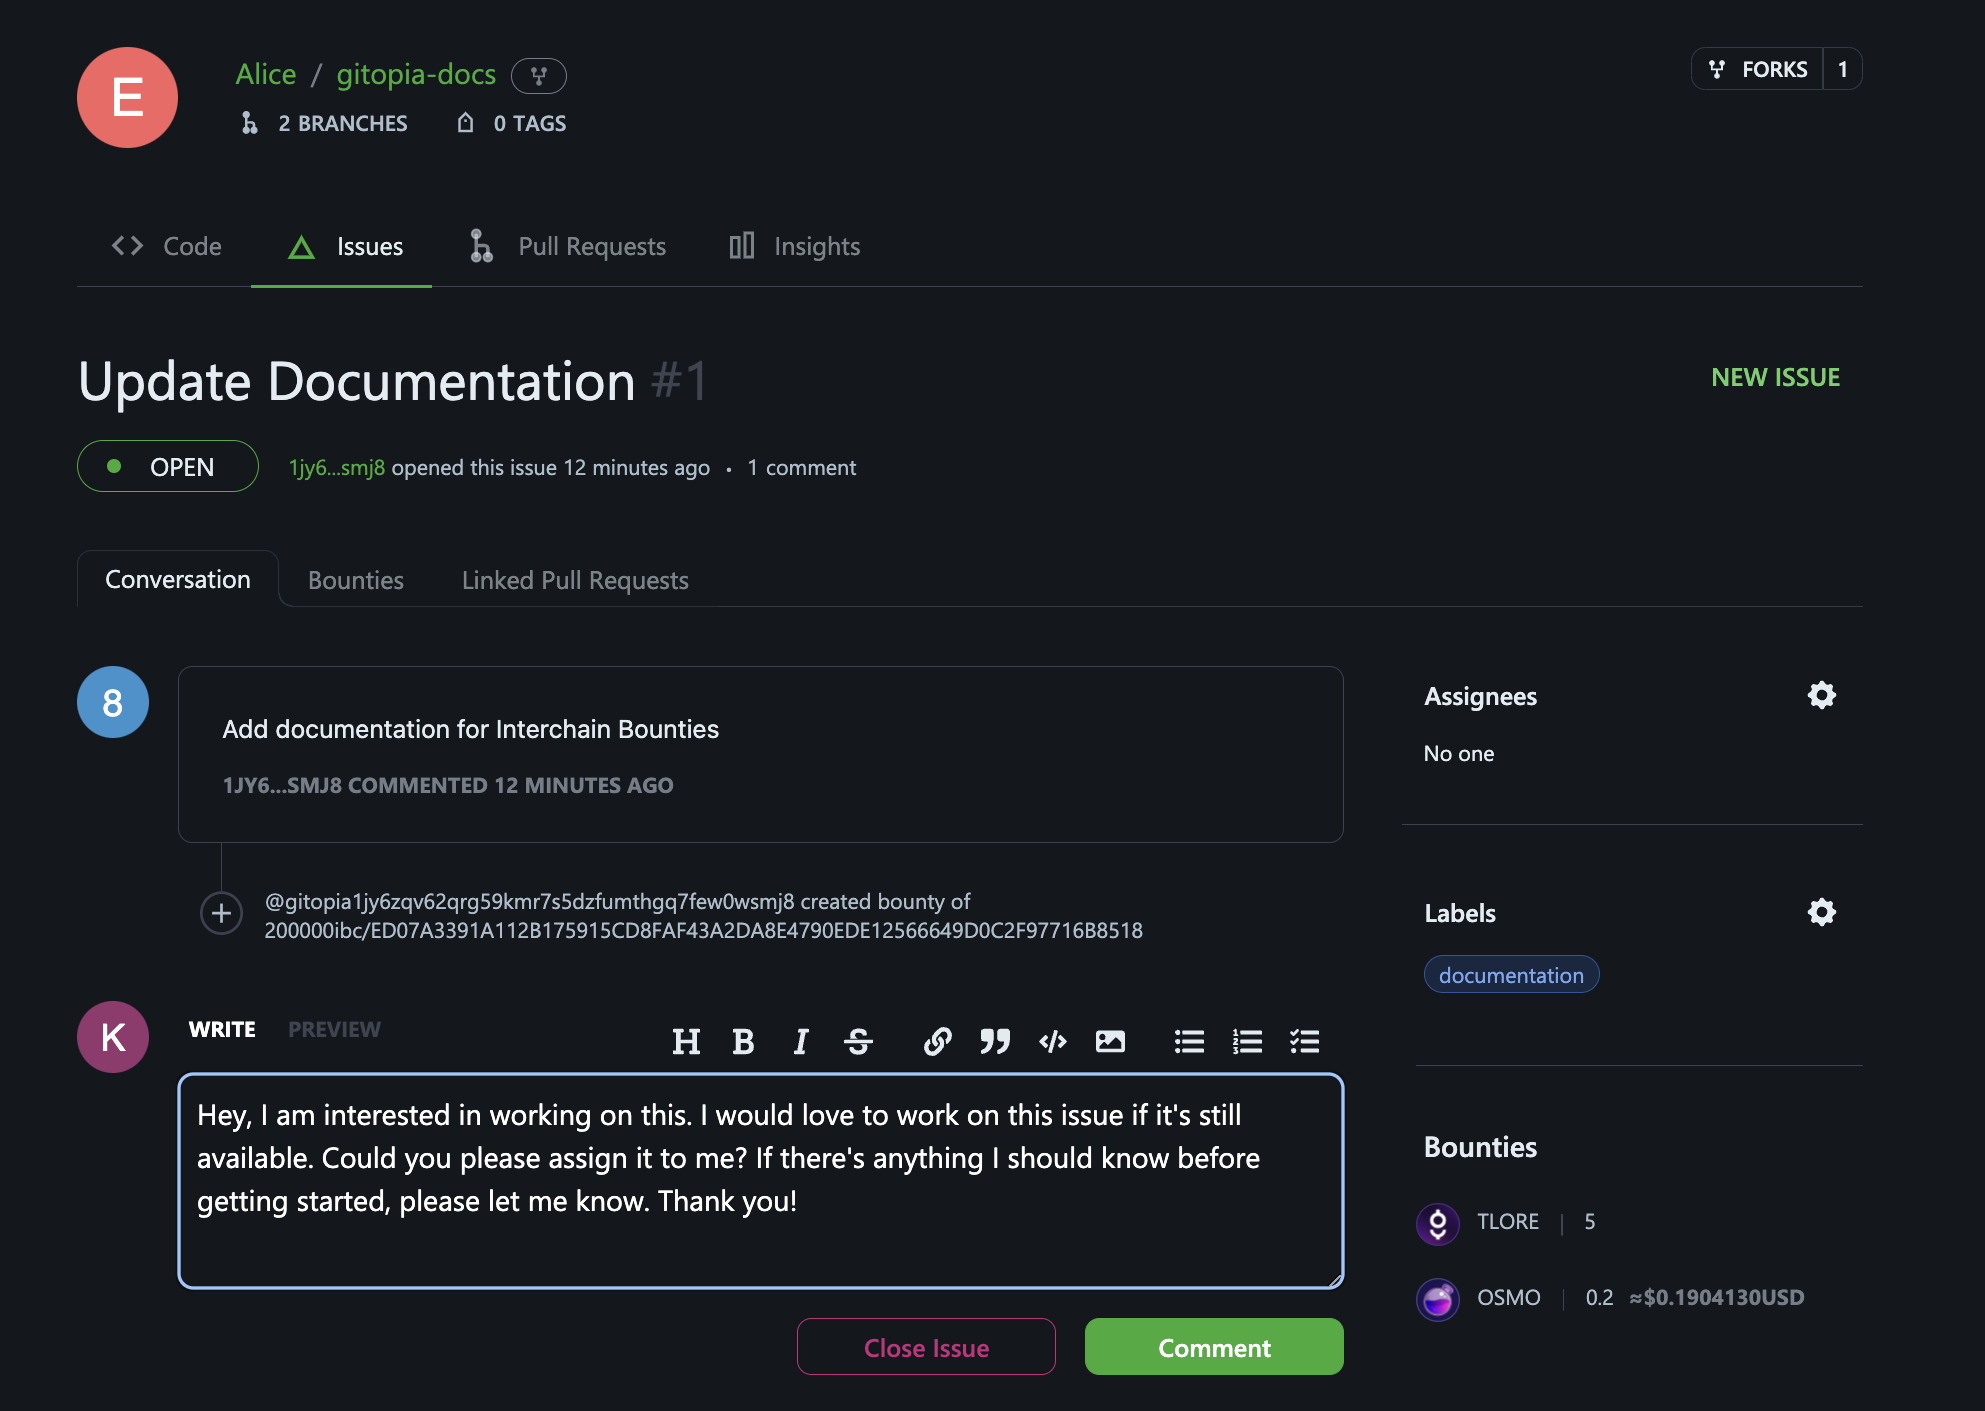
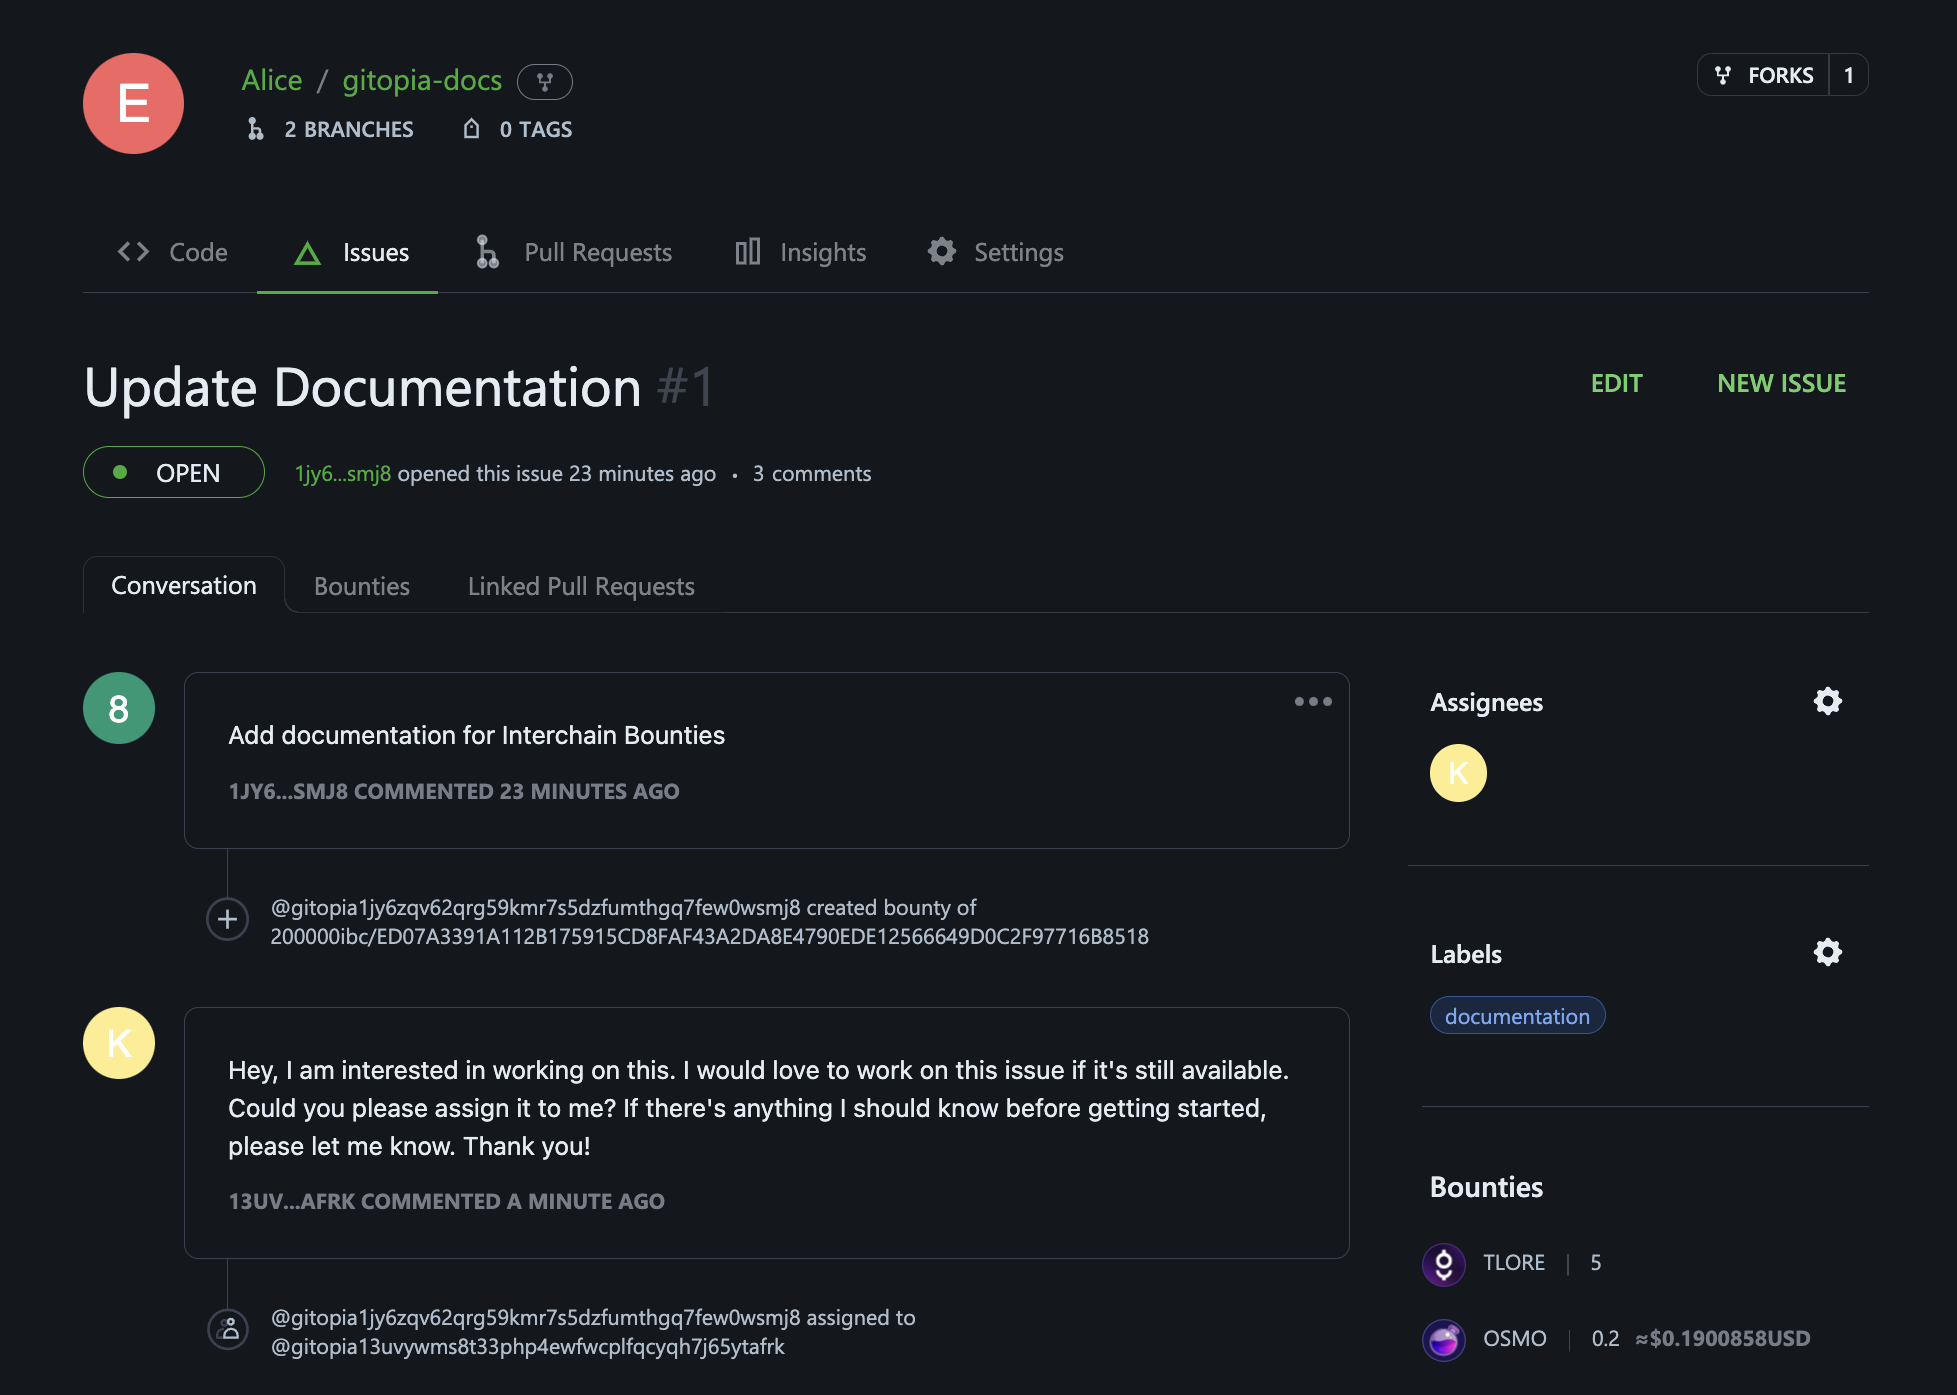
The newly created issue with the bounty is shown below.
Assign the bounty to an existing issue
To assign a Gitopia Bounty to an issue, follow these steps:
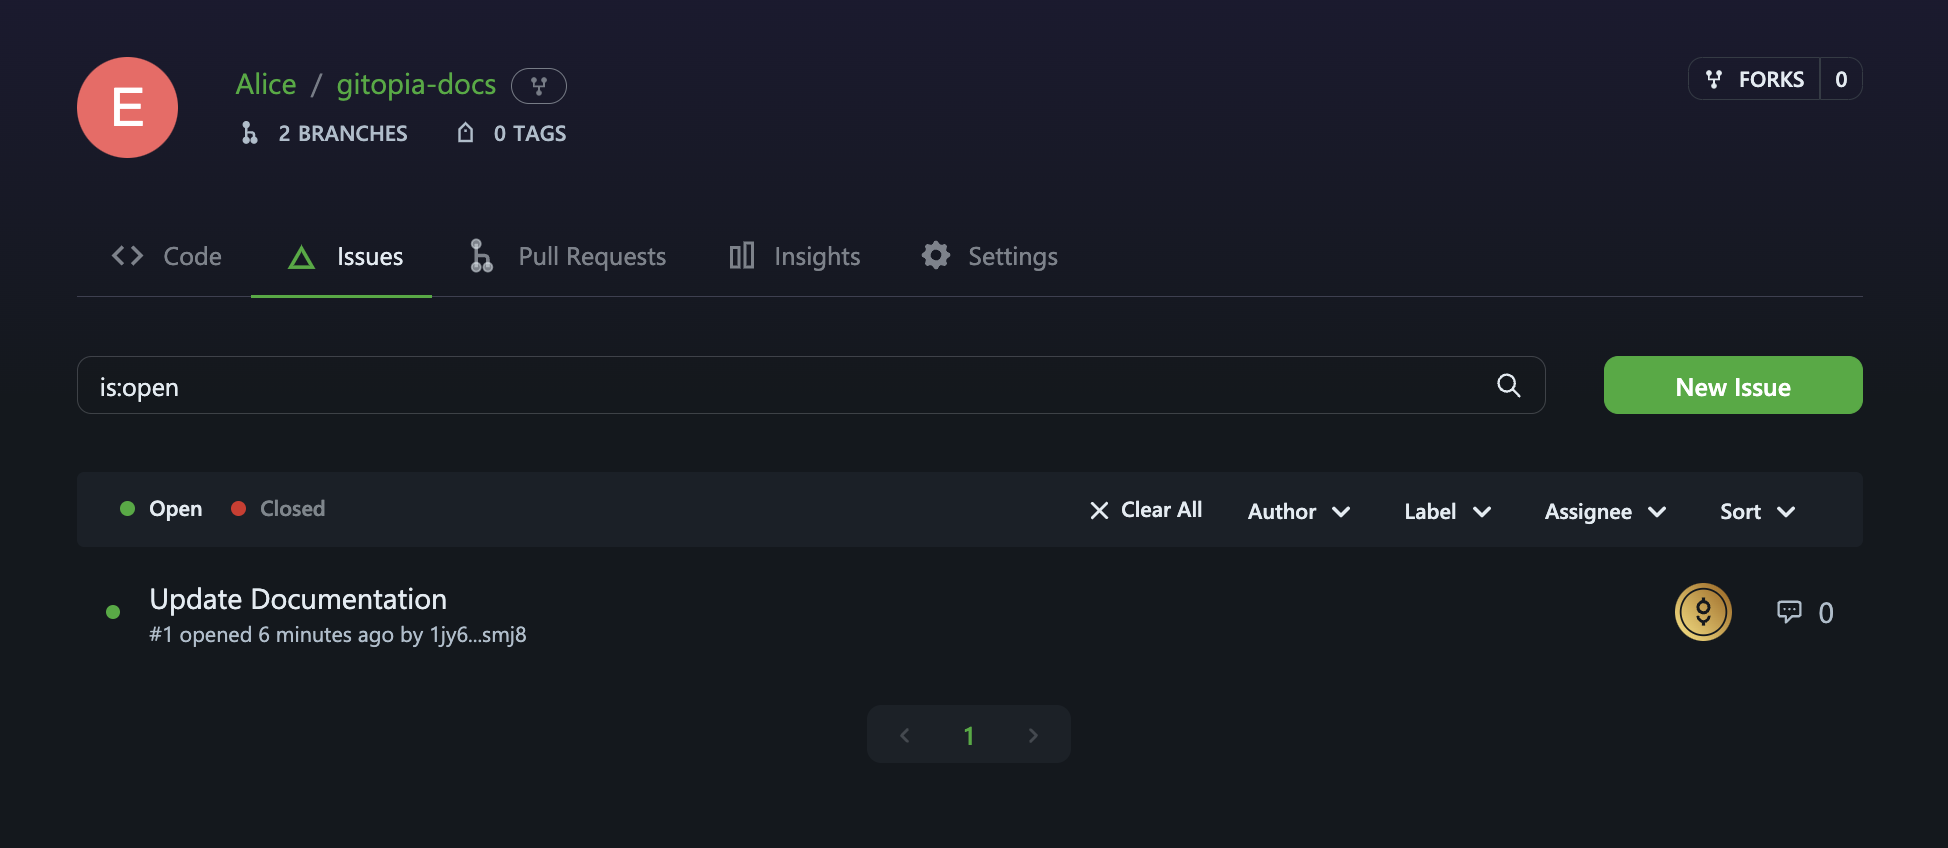
Step 1: Navigate to Repository Issues
To create an issue for a repository, first navigate to the main page of the repository and click on Issues under your repository name.
Step 2: Select the Issue
Find the issue that you want to assign the bounty to and click on its title.
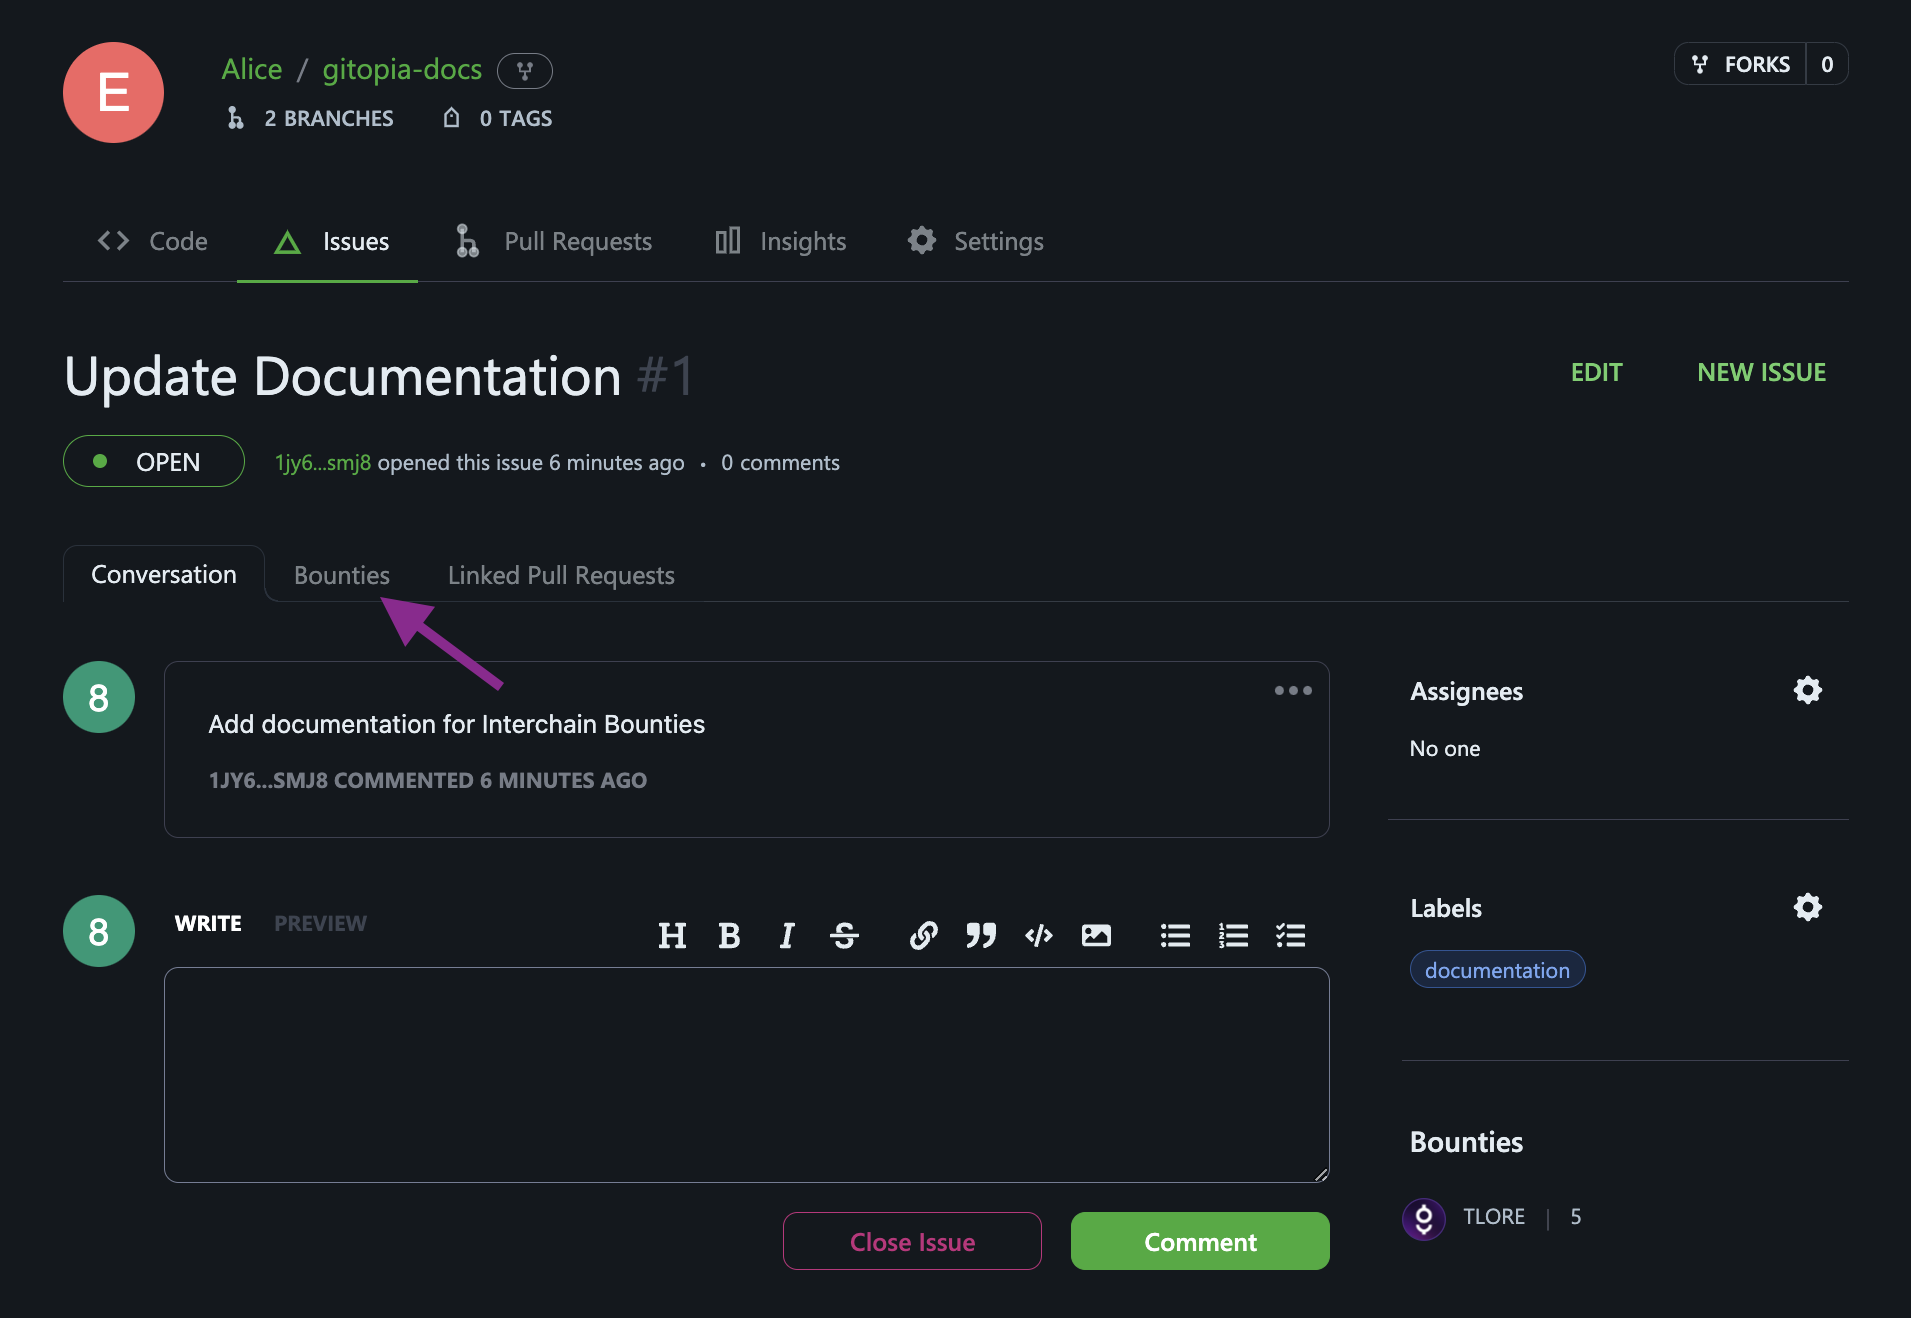
Step 3: Navigate to Bounties tab
Click on the Bounty tab as shown below.
Step 4: Add Bounty
- On the resulting page, you can manage existing bounties or add new ones.
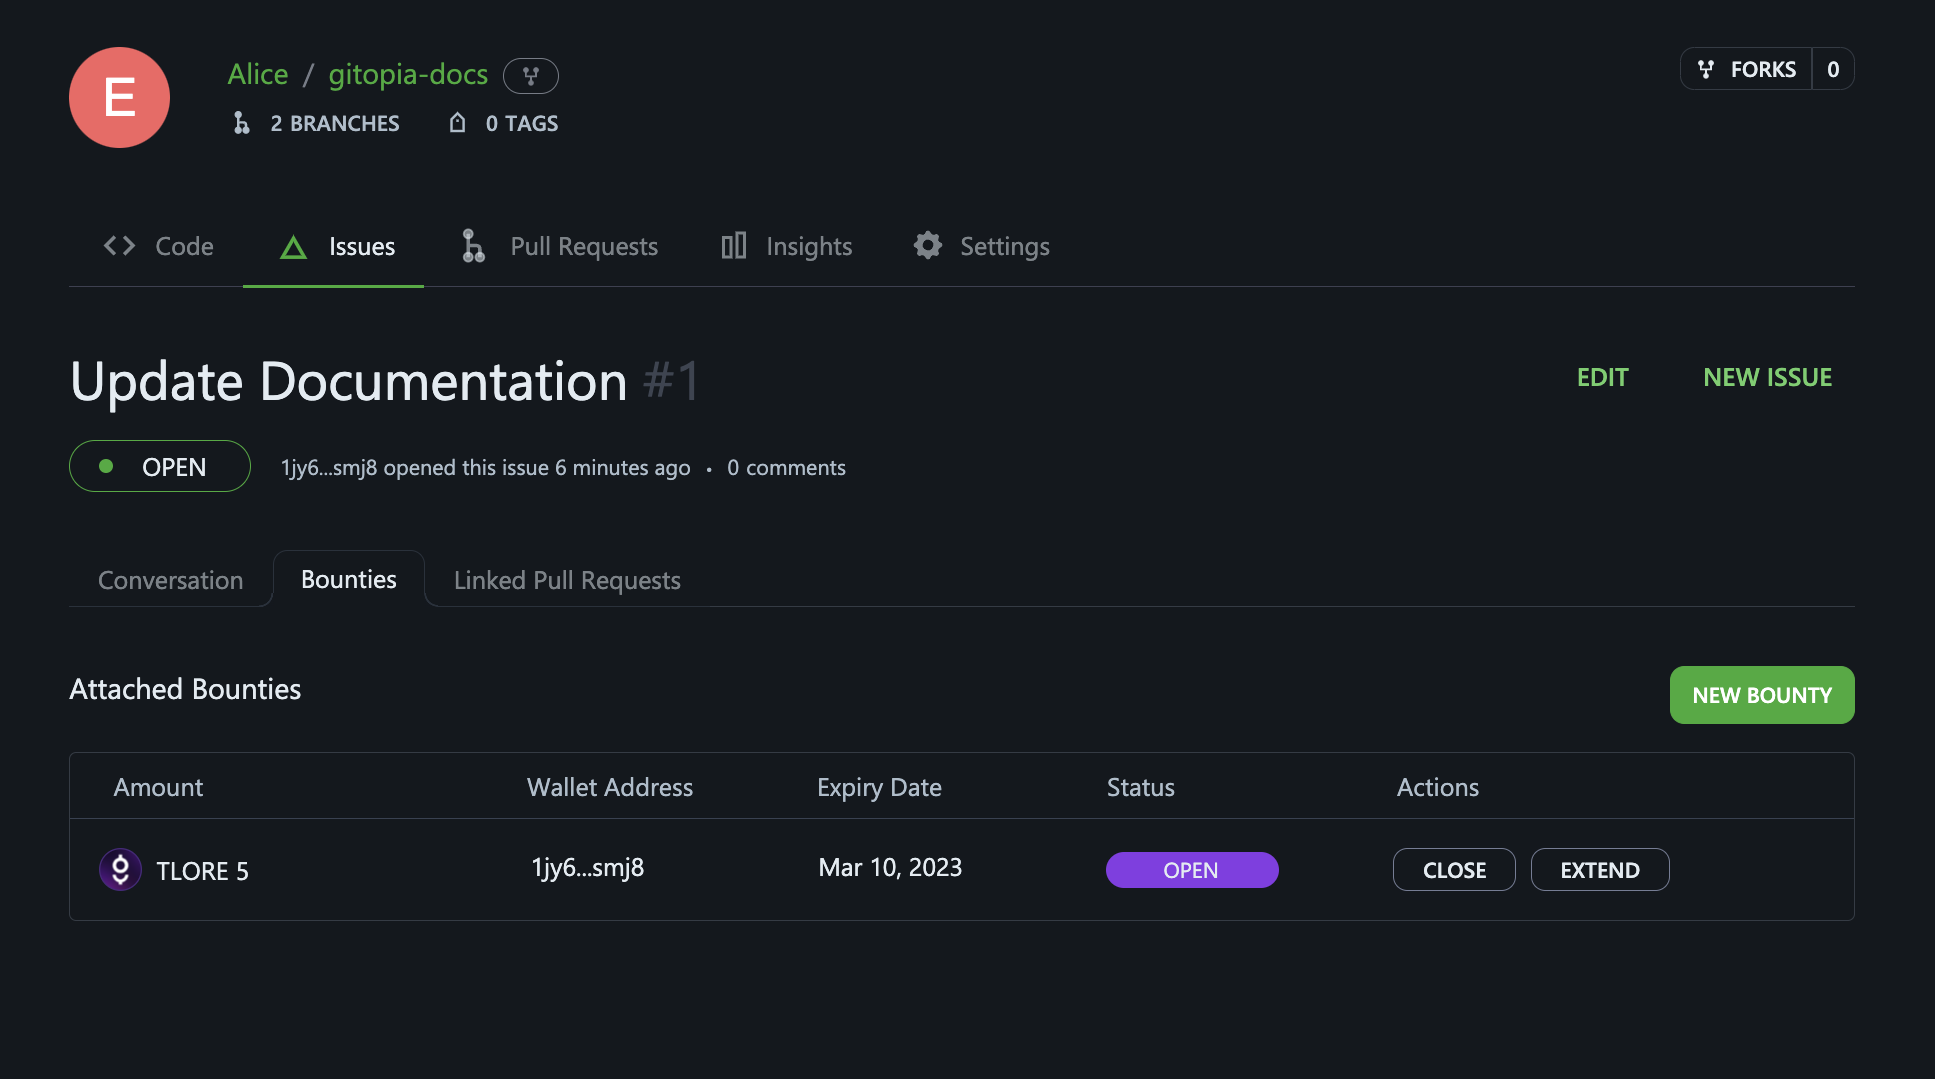
- To add a new bounty, click on NEW BOUNTY. This will take you to the bounty creation dialog box.
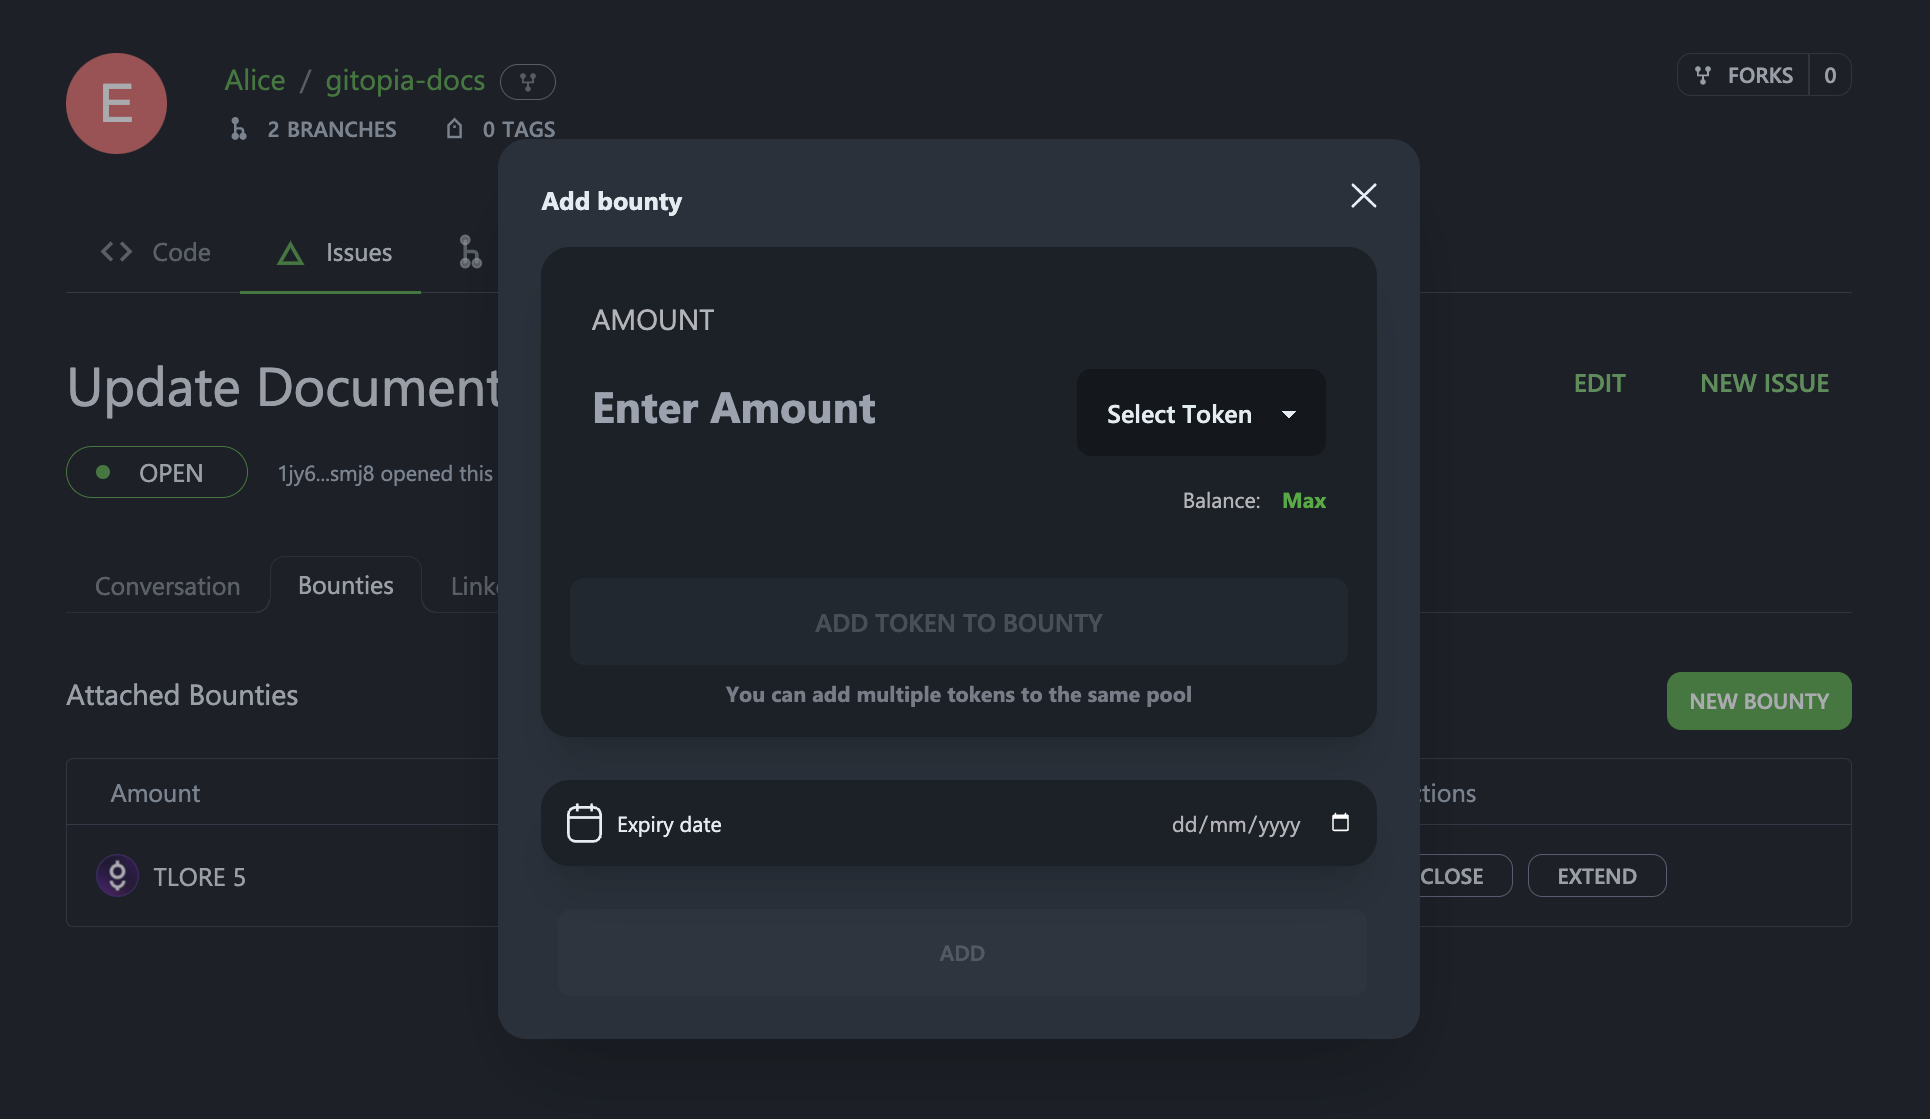
- Now, select the token you want to use and enter the amount. When done click on ADD TOKEN TO BOUNTY.
- Next, select an Expiry date for the bounty and when done, click on ADD to add the bounty to the issue.
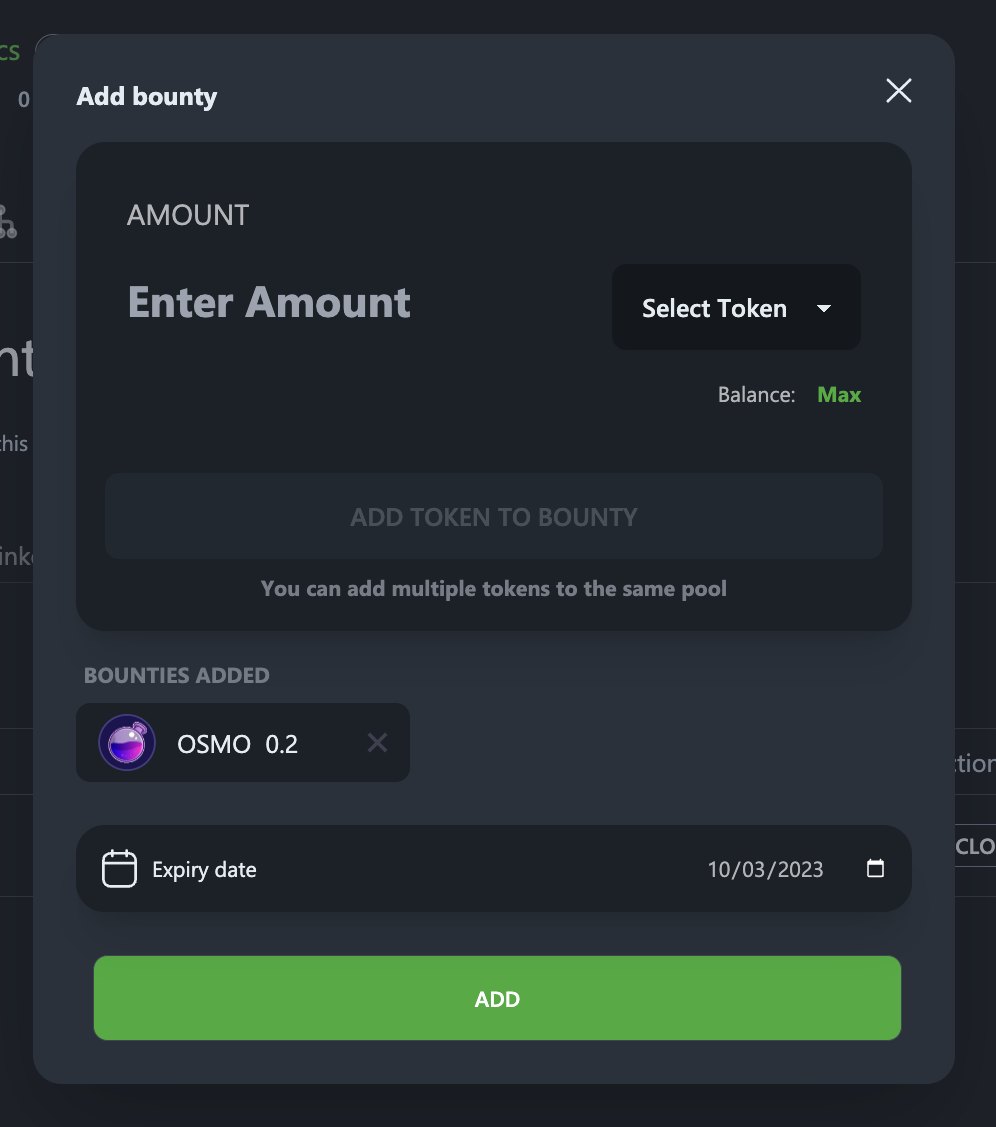
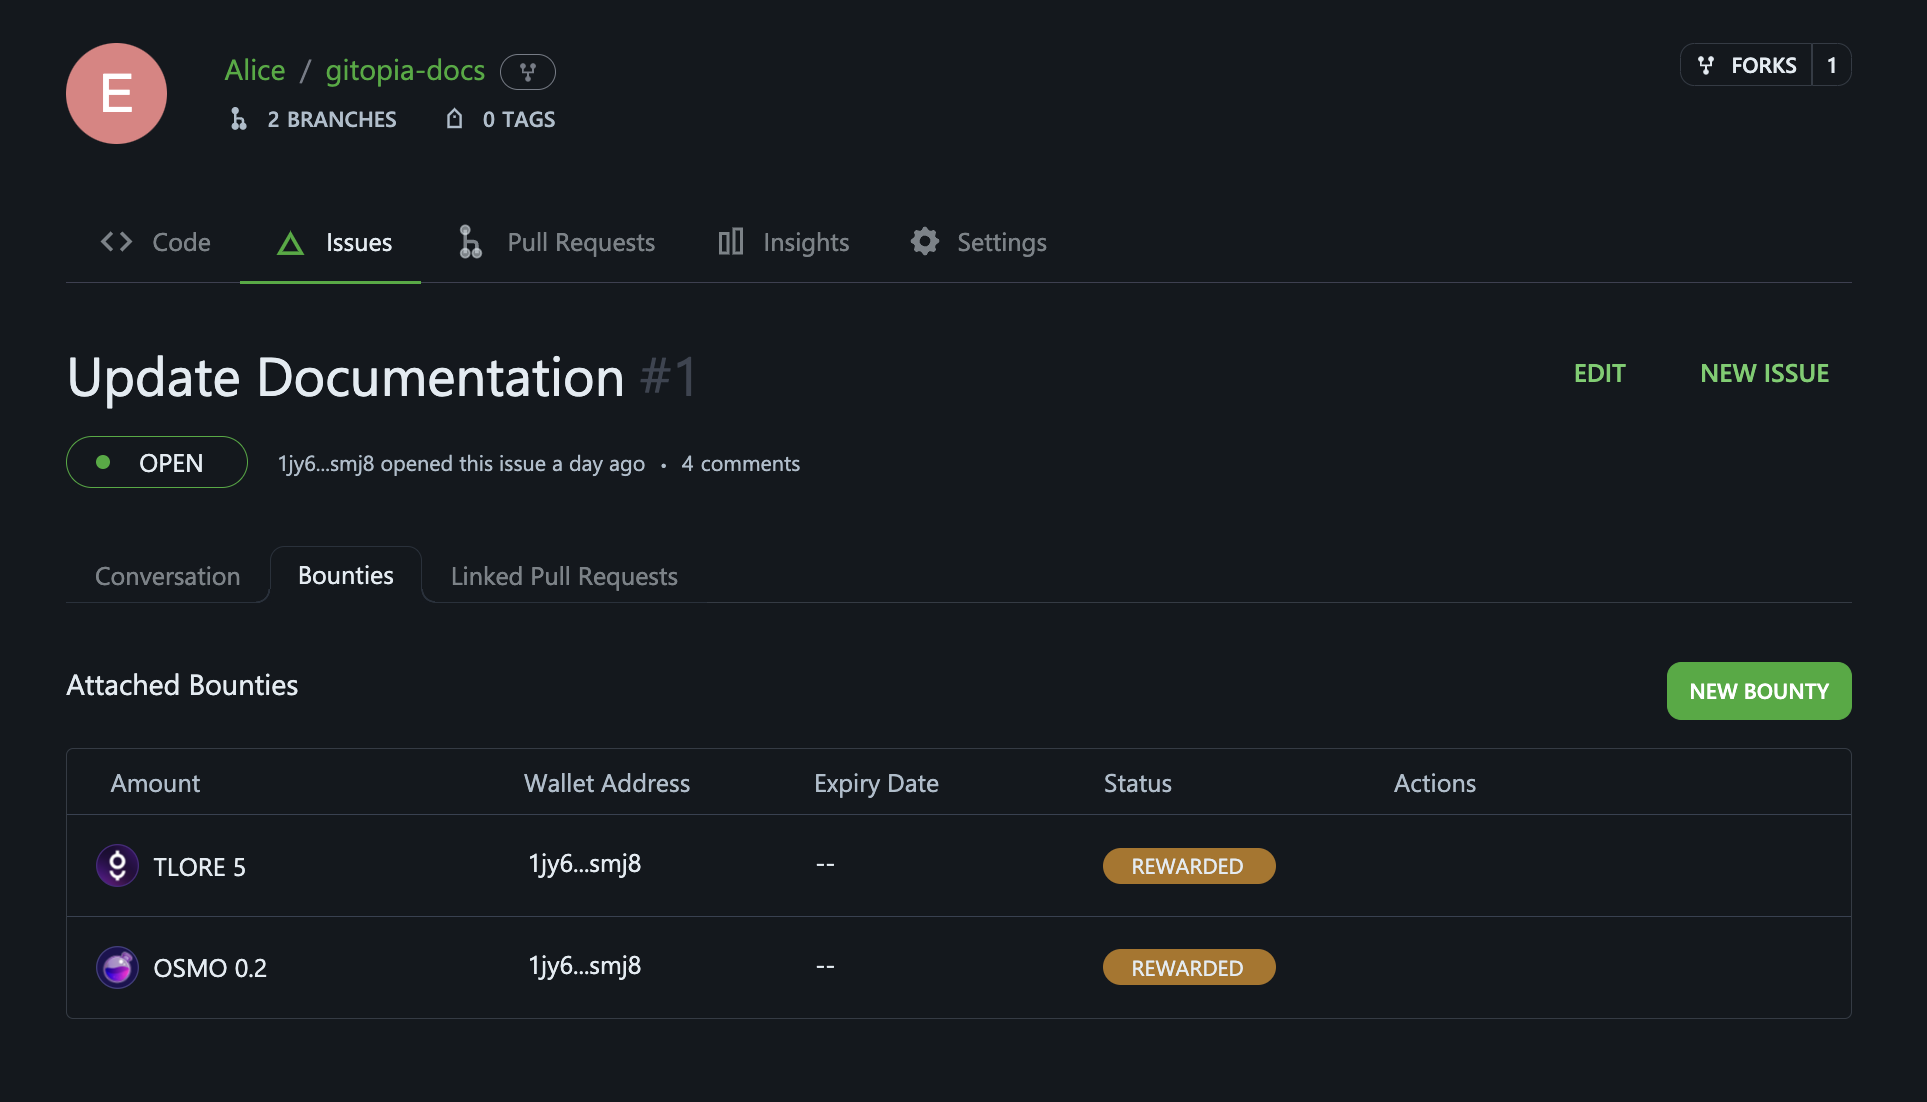
- The new bounty has been successfully added to the issue.
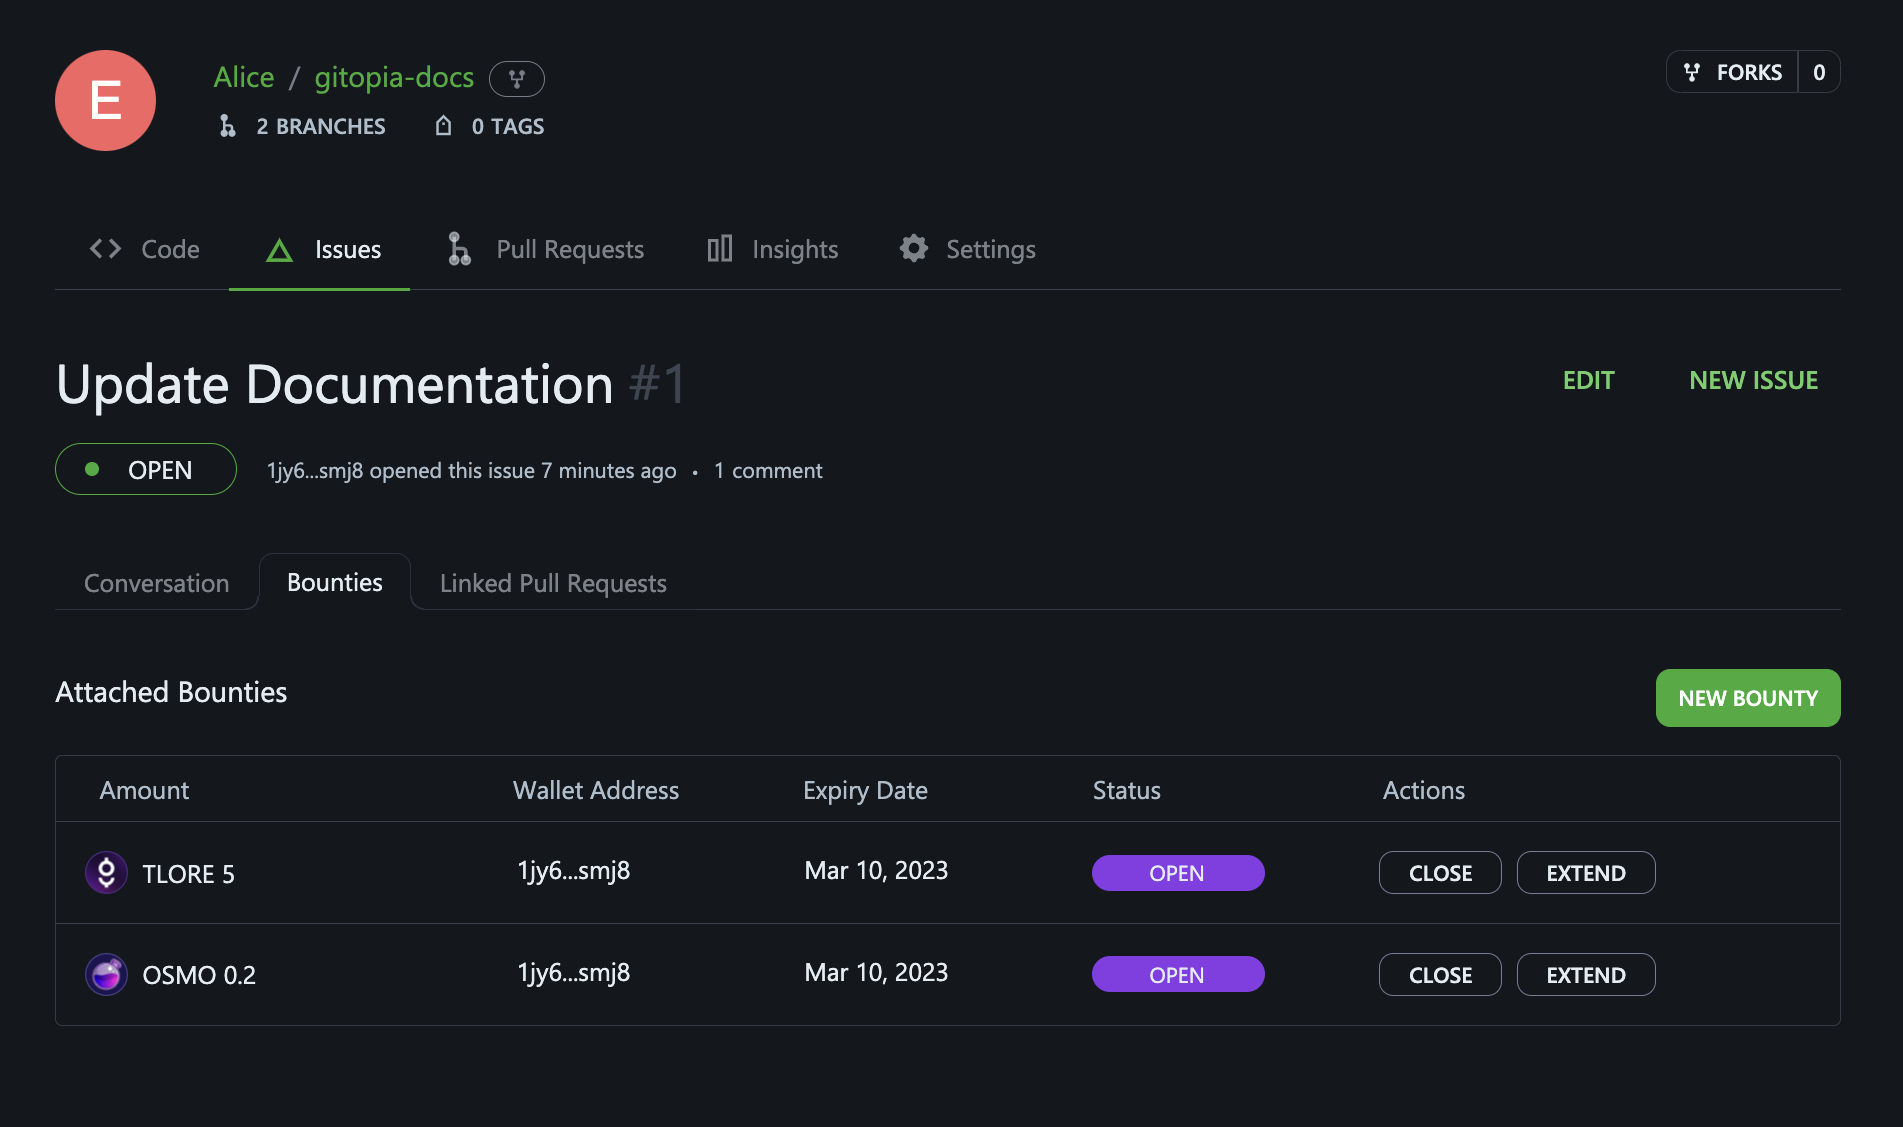
- The new issue page is shown below.
Manage existing bounties
To manage existing Gitopia Bounties, follow these steps:
Step 1: Navigate to Repository Issues
To create an issue for a repository, first navigate to the main page of the repository and click on Issues under your repository name.
Step 2: Select the Issue
Find the issue that the bounty is assigned to and click on its title.
Step 3: Navigate to Bounties tab
Click on the Bounty tab.
Step 4: Edit the Bounty
Here, you'll be able to view, add new bounties, extend expiry or close the bounty as needed.
You cannot close the bounty if at least one PR is linked to the issue. You would need to unlink that PR first before closing the bounty. The same is valid for closing an issue with a bounty attached.
How Interchain Bounties Works
Step 1: Add Bounty to an Issue
The project maintainer or a user creates an issue with a bounty or adds a bounty to an existing issue.
Step 2: Attract Contributors
Once an issue with a bounty has been created, contributors can start showing interest in solving the issue by commenting on the issue.
Step 3: Assign Issue
The project maintainer assigns the issue to a chosen contributor.
This step is crucial, as the bounty will be released to the contributor upon successful PR merge only if the issue has been assigned to him.
Step 4: Create Pull Request
The contributor forks the repository, solves the issue, and creates a Pull Request.
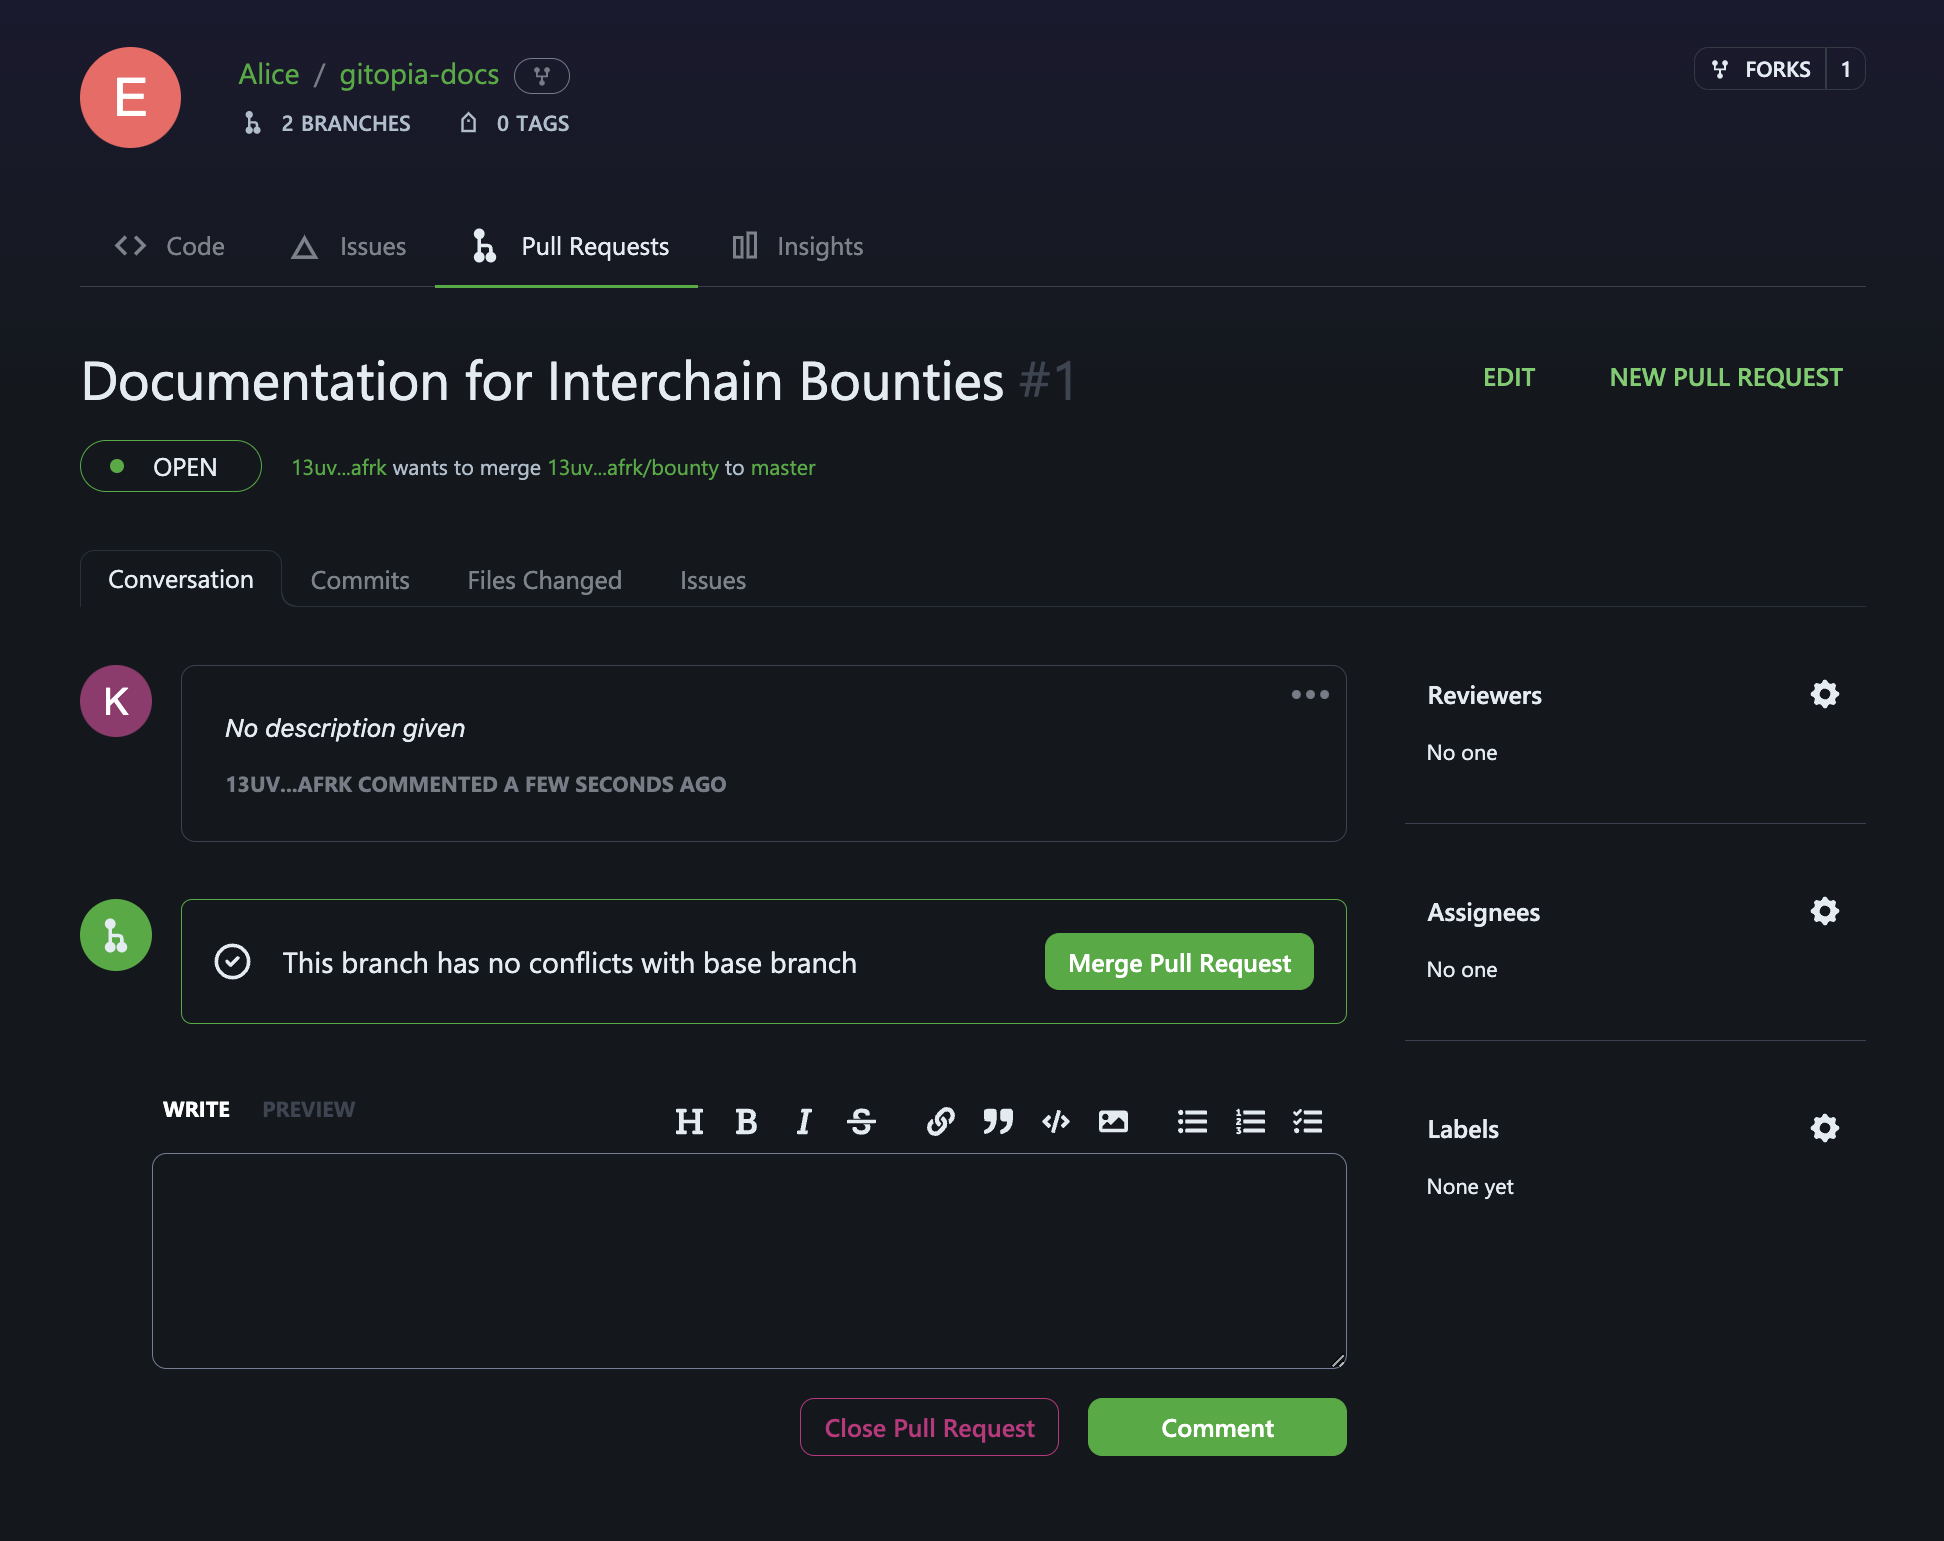
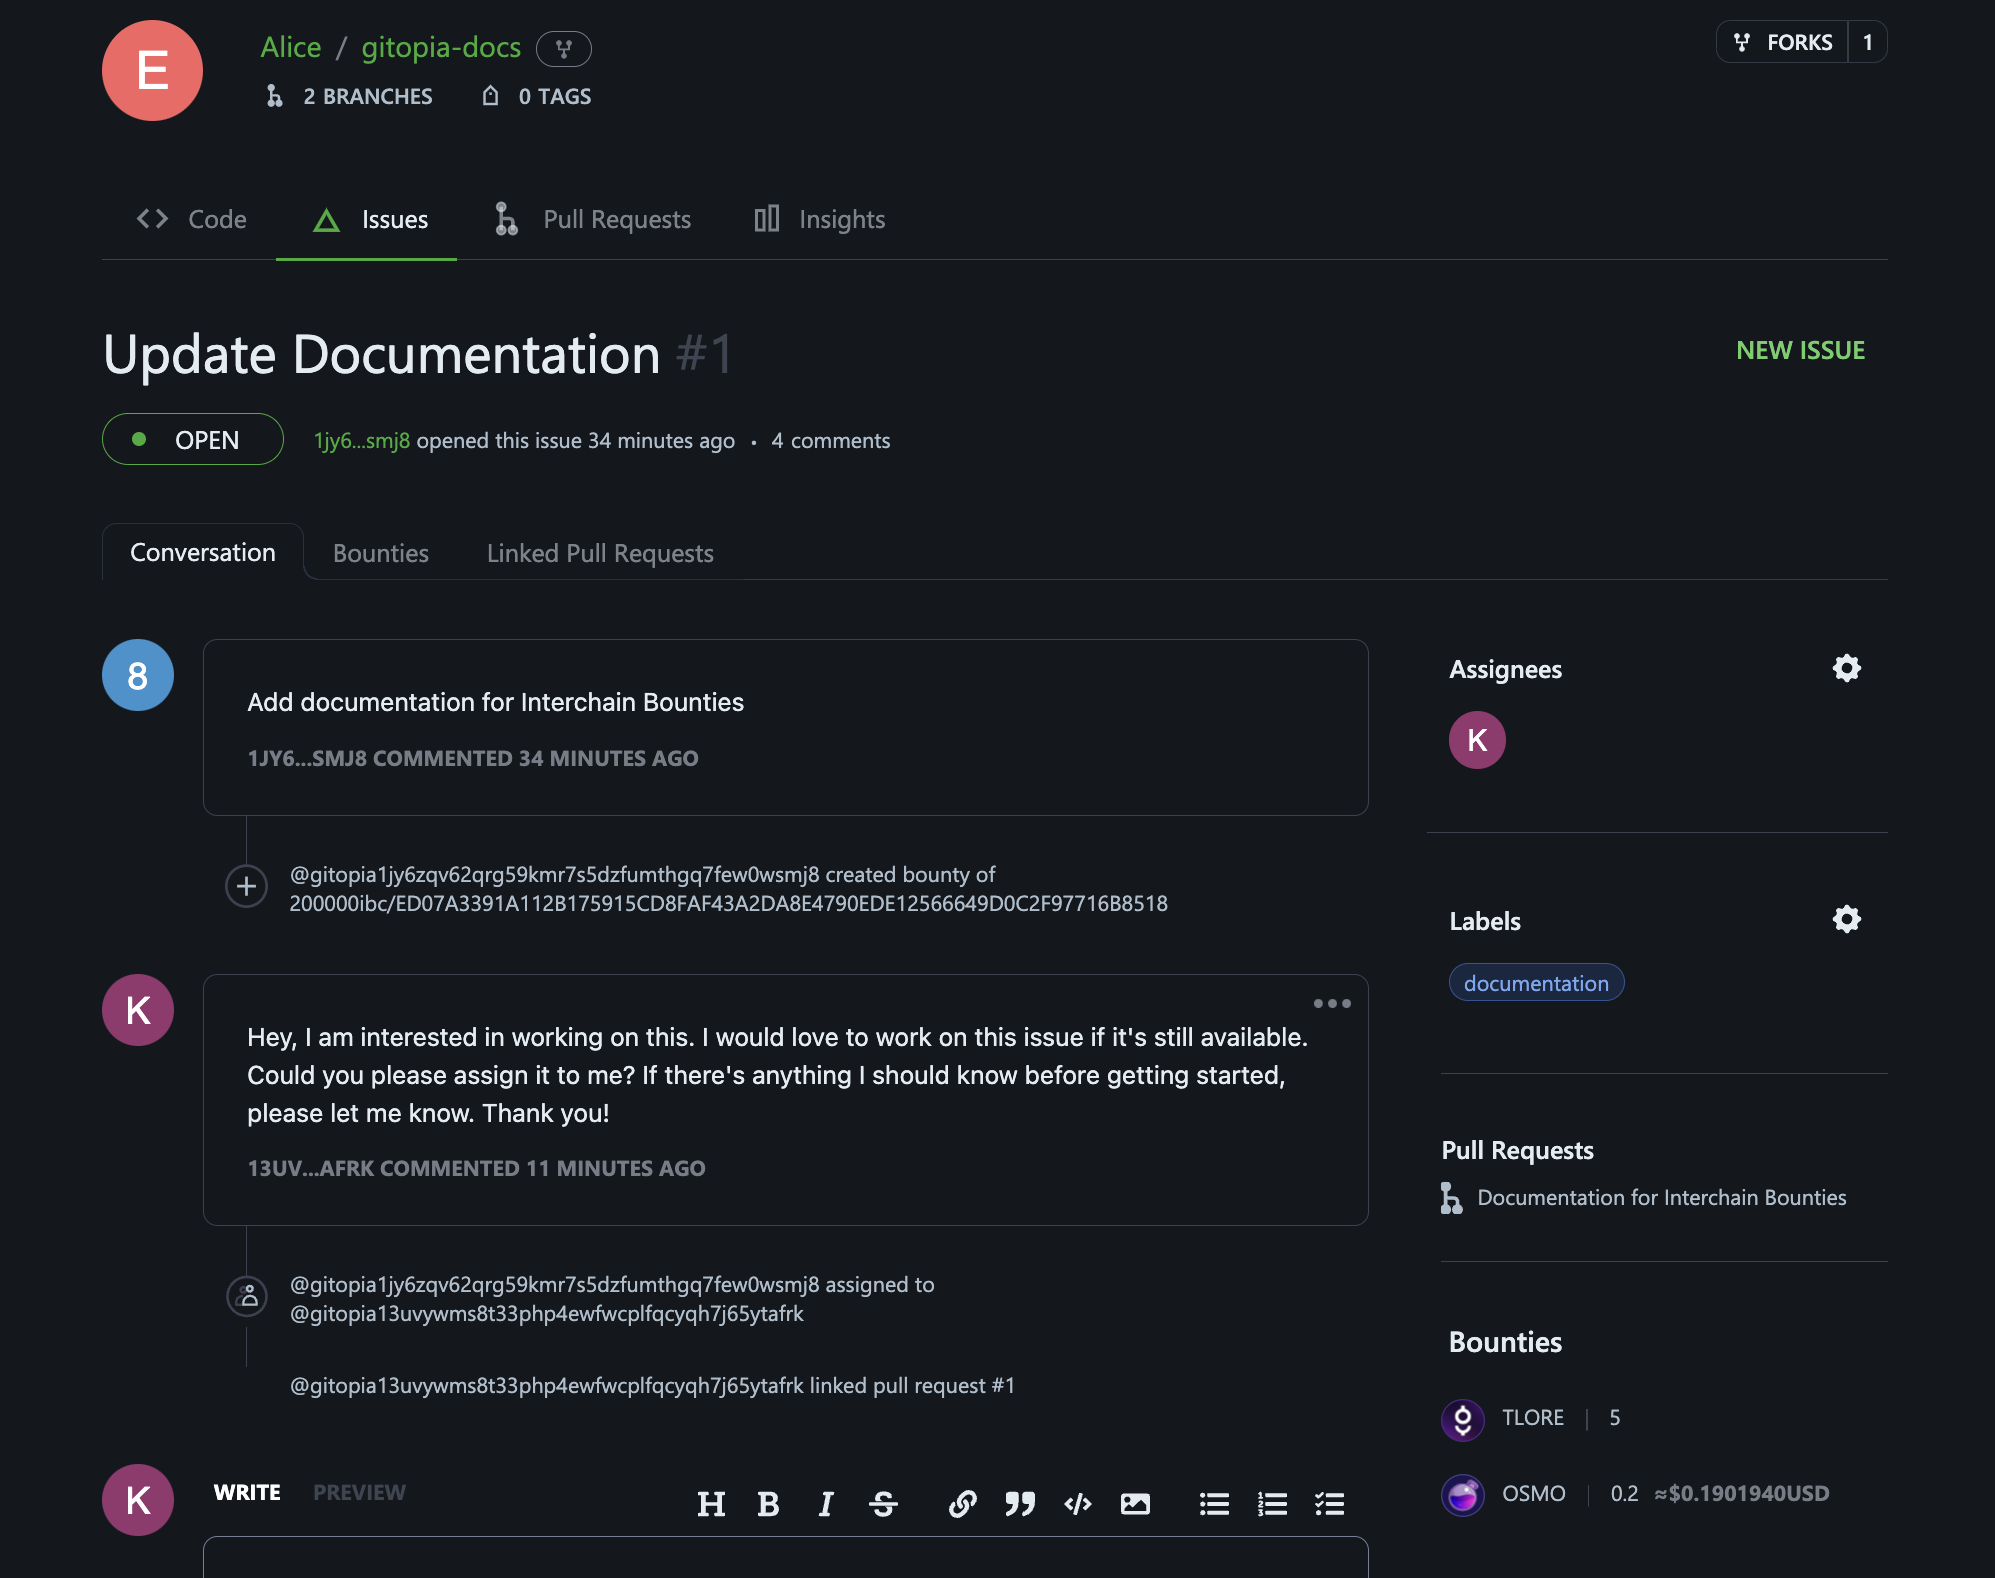
Step 5: Link PR with the Bounty Issue
The contributor links the Pull Request with the issue being solved, which helps track the progress of the issue and ensure that the bounty is correctly awarded.

The below image shows issue page with a linked Pull Request:
Step 6: Verify Pull Request
The project maintainer verifies the Pull Request and ensures that it is linked to the correct issue.
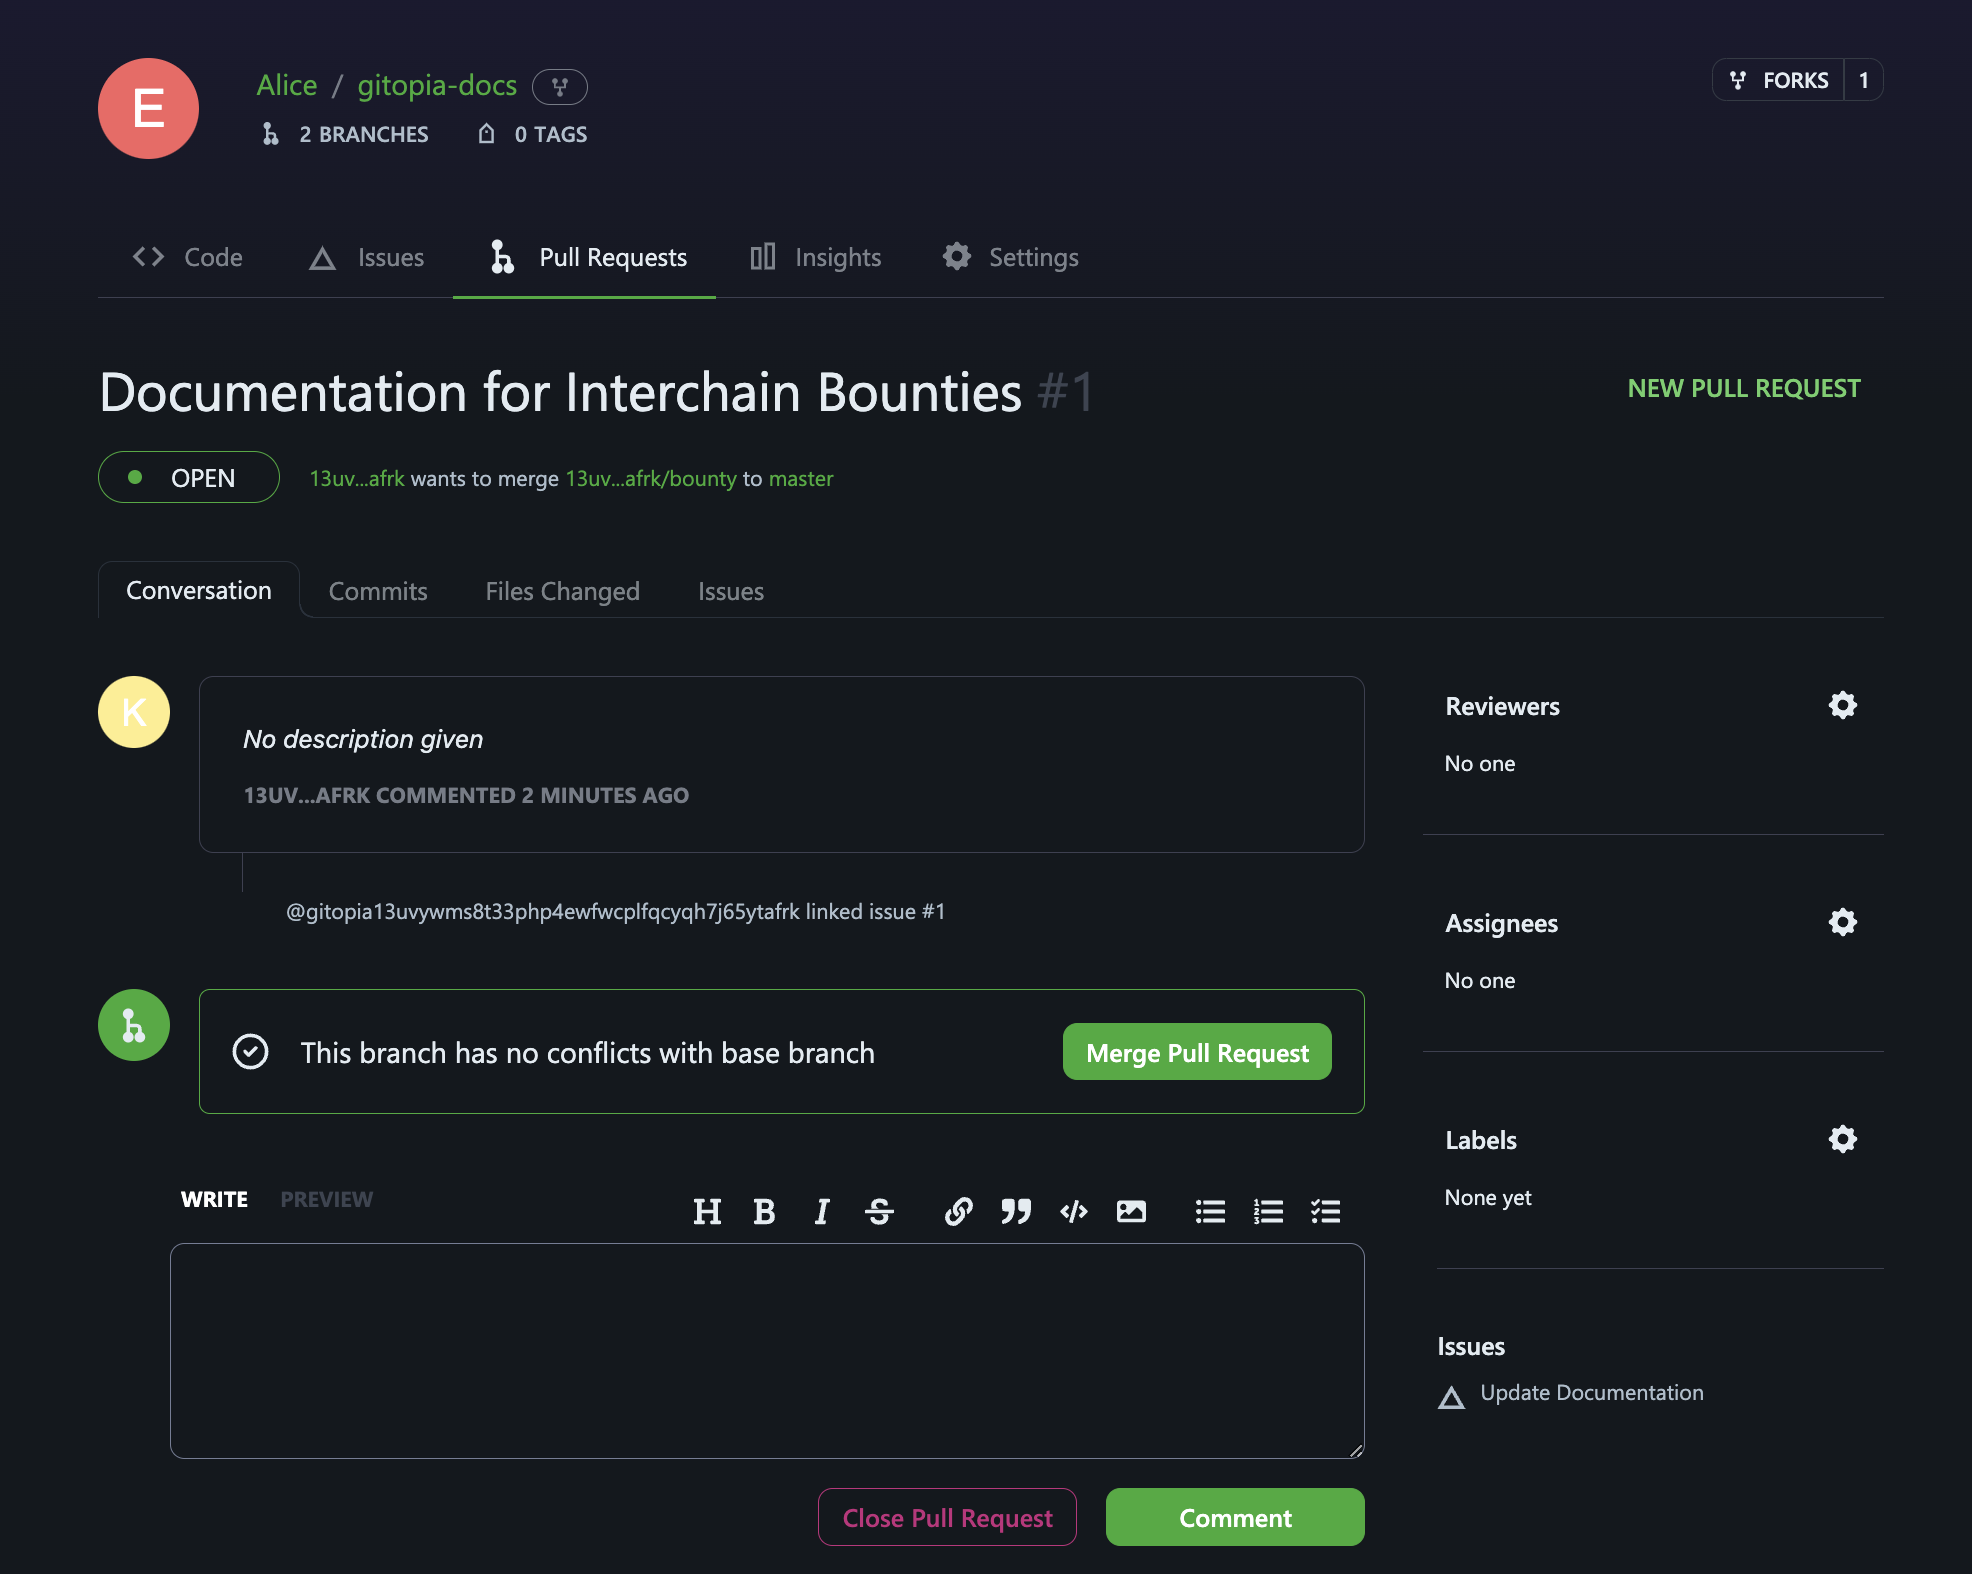
Step 7: Merge Pull Request
The project maintainer merges the Pull Request into the main branch of the repository.
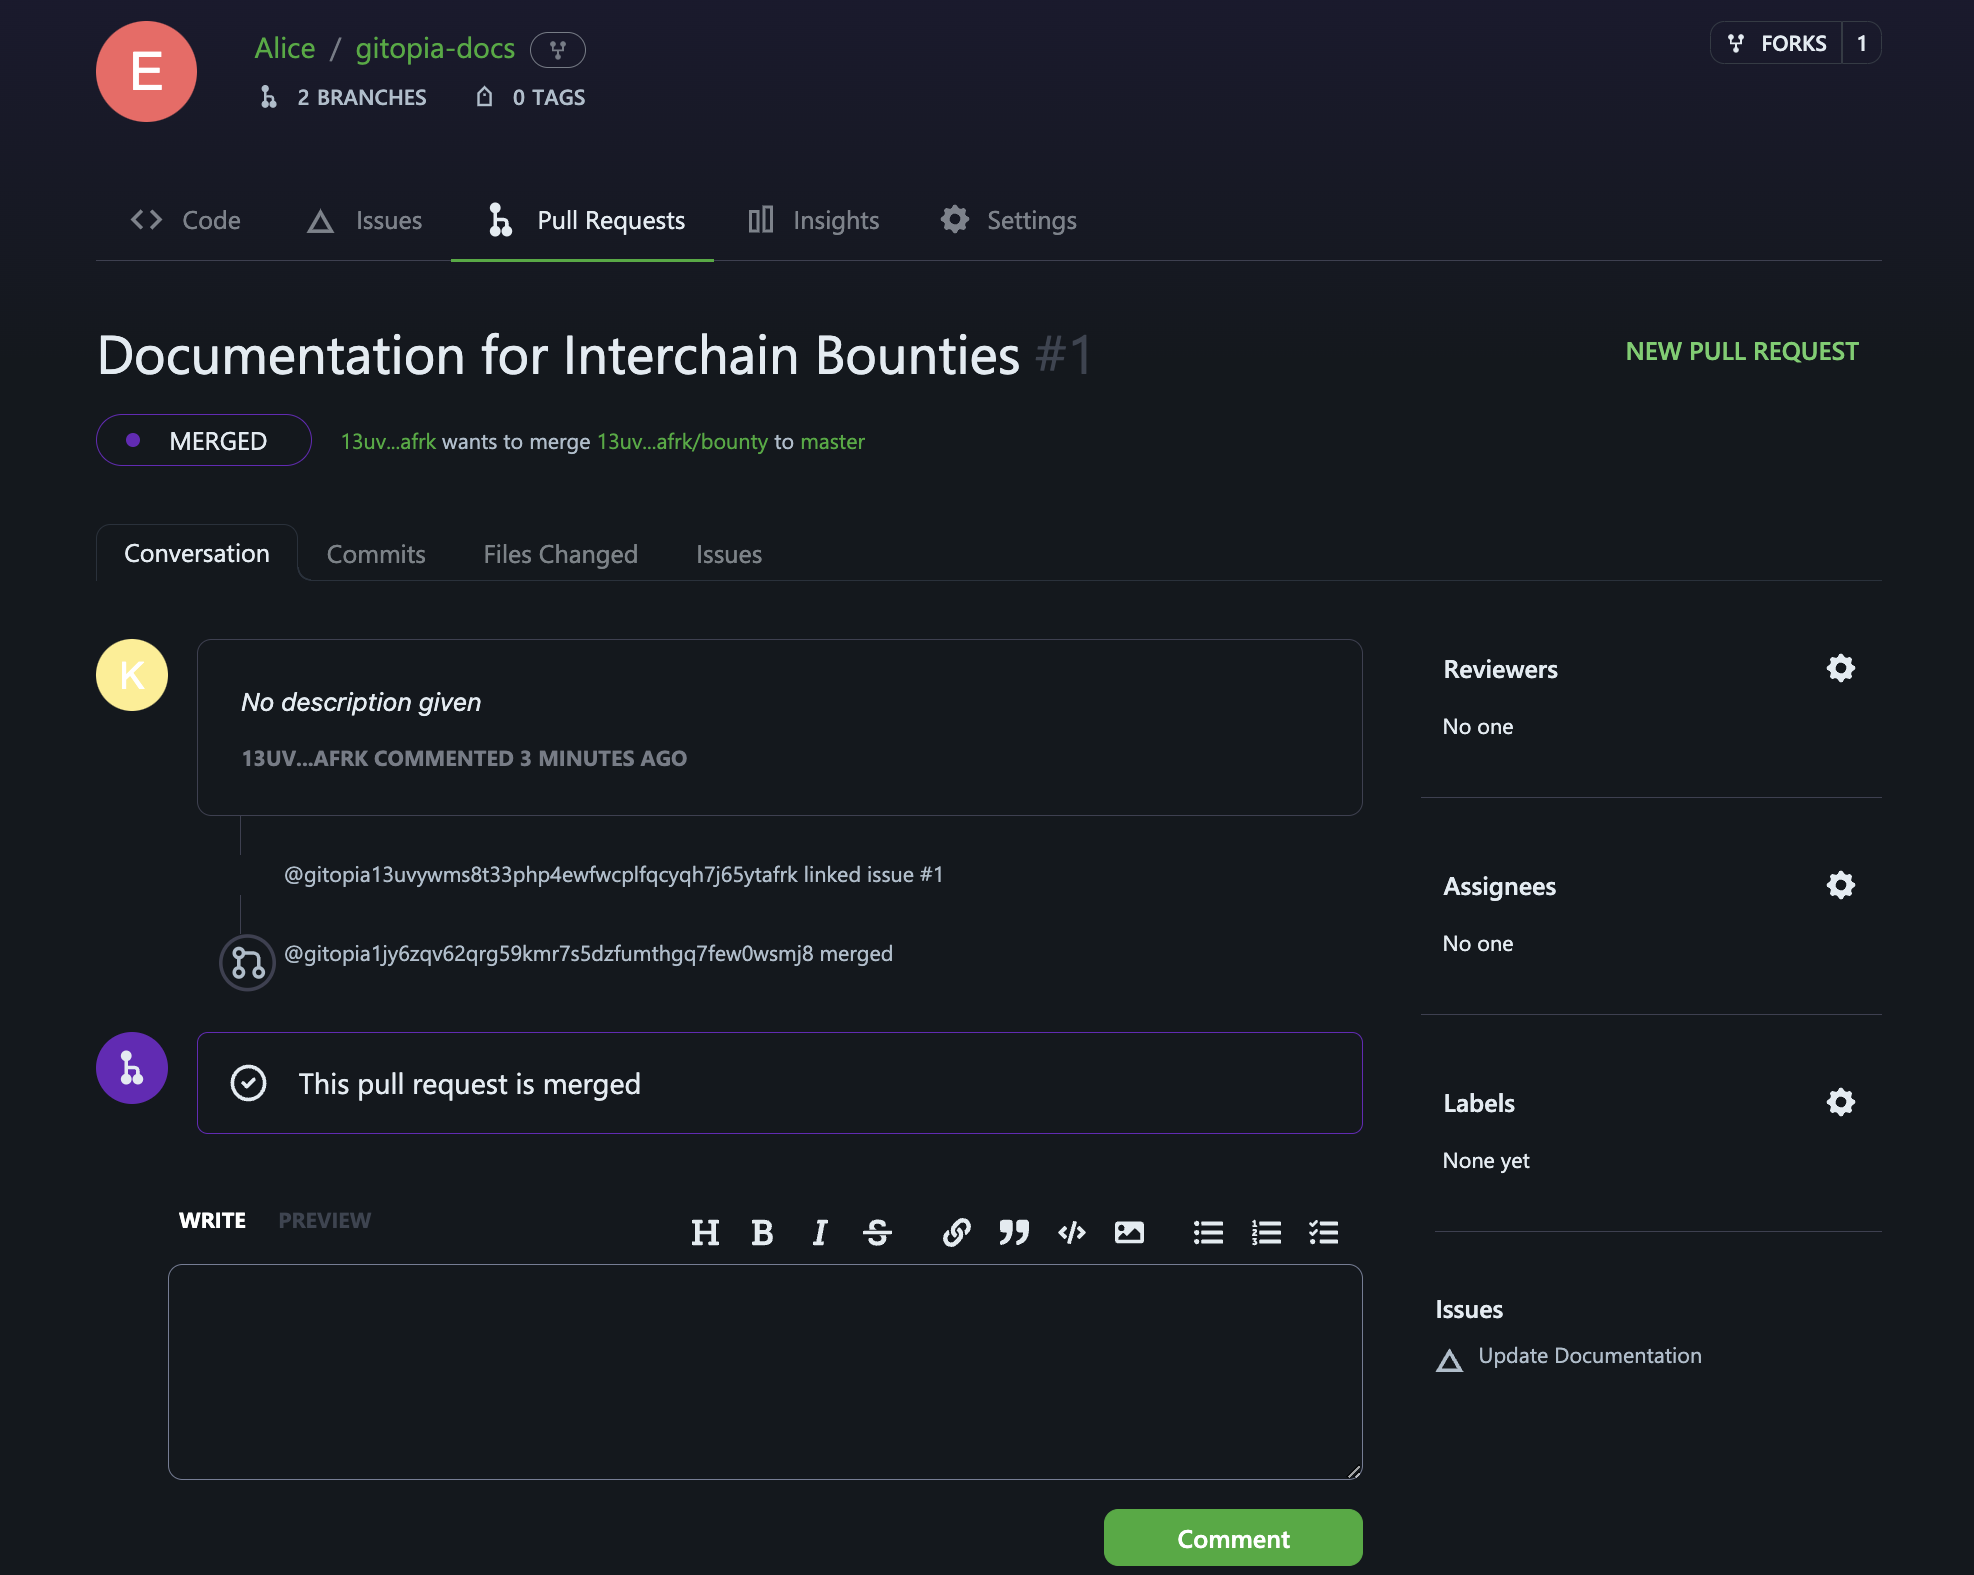
Step 8: Bounty is Released
The bounty is automatically released to the contributor upon successful merge of the Pull Request.