Repository
Gitopia is a decentralized, censorship-resistant code collaboration platform for hosting and managing git repositories.
A repository contains all of your project's files and each file's revision history. The repository is a unit for developer collaboration. It is the place where people most people come together to build software. Developers share their contributions and interact within a repository.
You can own repositories individually, or you can share ownership of repositories with other people in an organization.
Creating a New Repository
Step 1: Choose Account or DAO
You can create a new repository on your personal account or any DAO where you have sufficient permissions.
Step 2: Log in with your Wallet
To create a new repository on Gitopia you need to be logged in to your Gitopia Wallet and the wallet should contain a sufficient amount of LORE tokens.
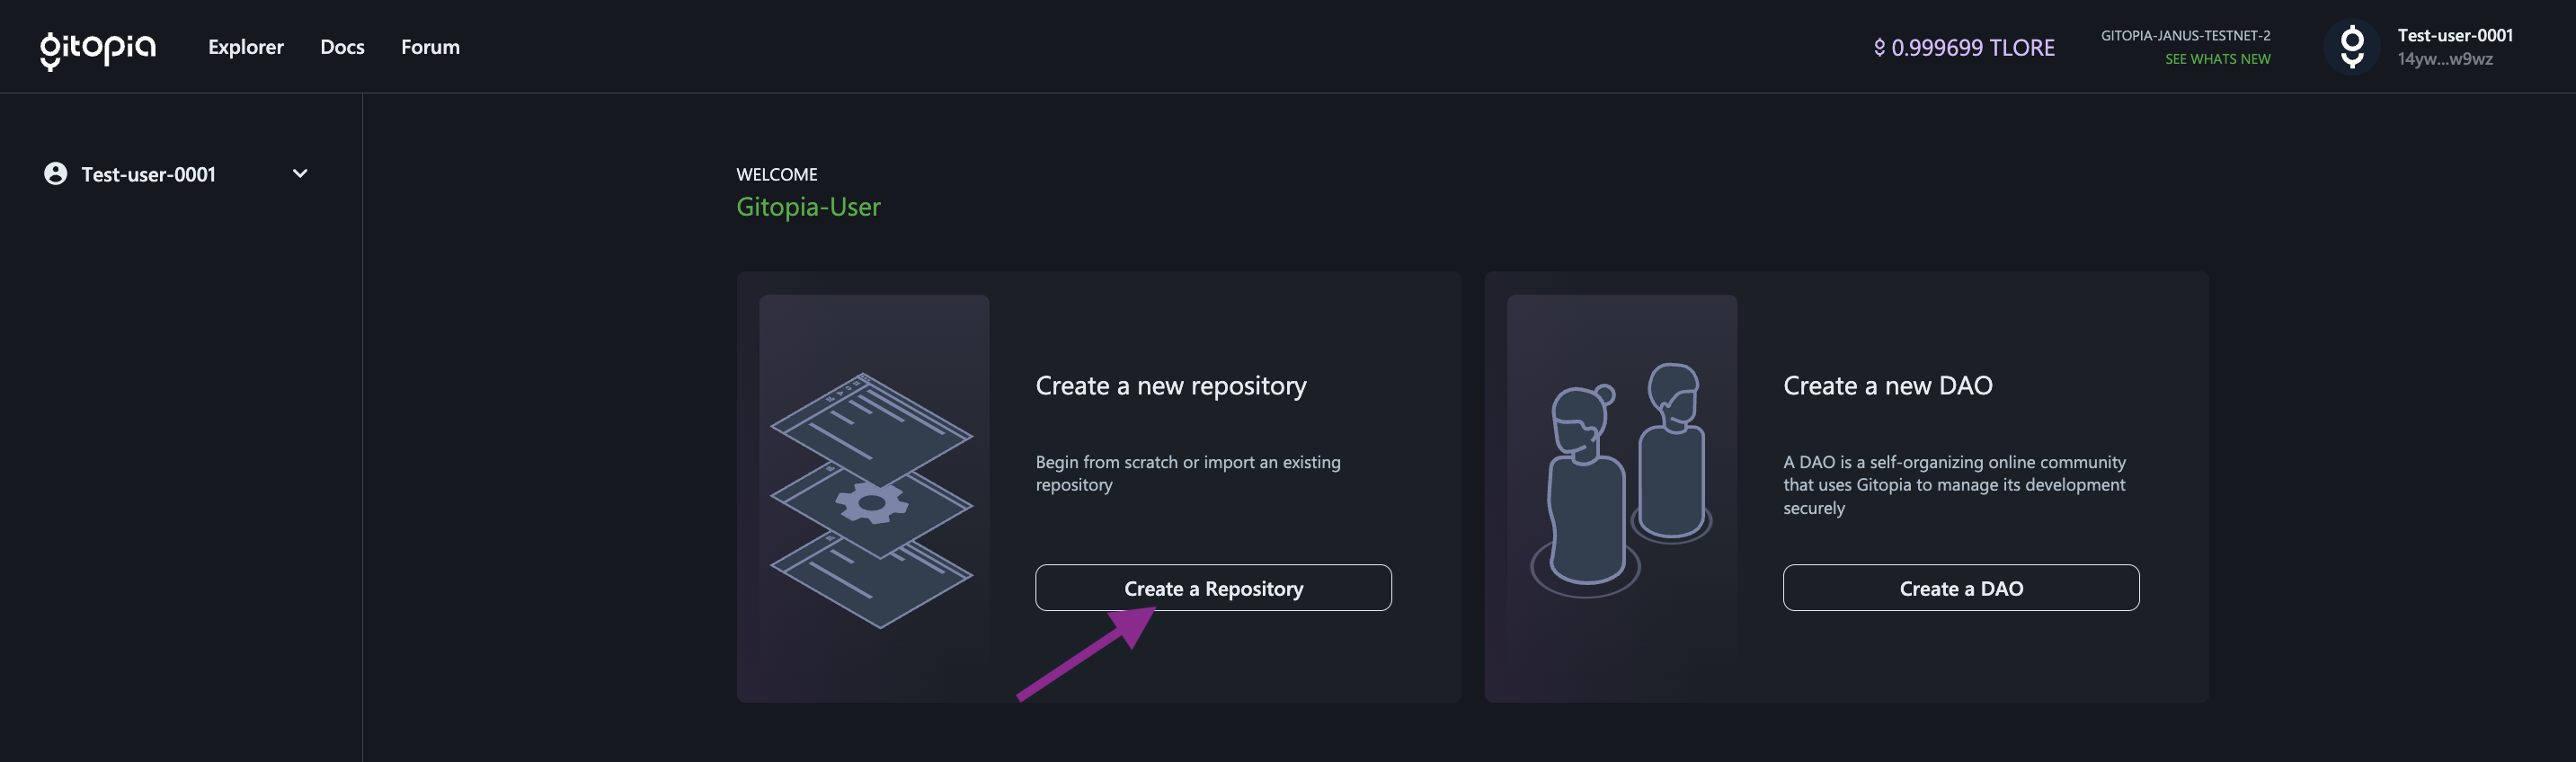
Step 3: Click on "Create Repository"
Once the above conditions have been met, you can create a new repository by clicking on Create a Repository icon on the Home Page.
Step 4: Enter Repository Information
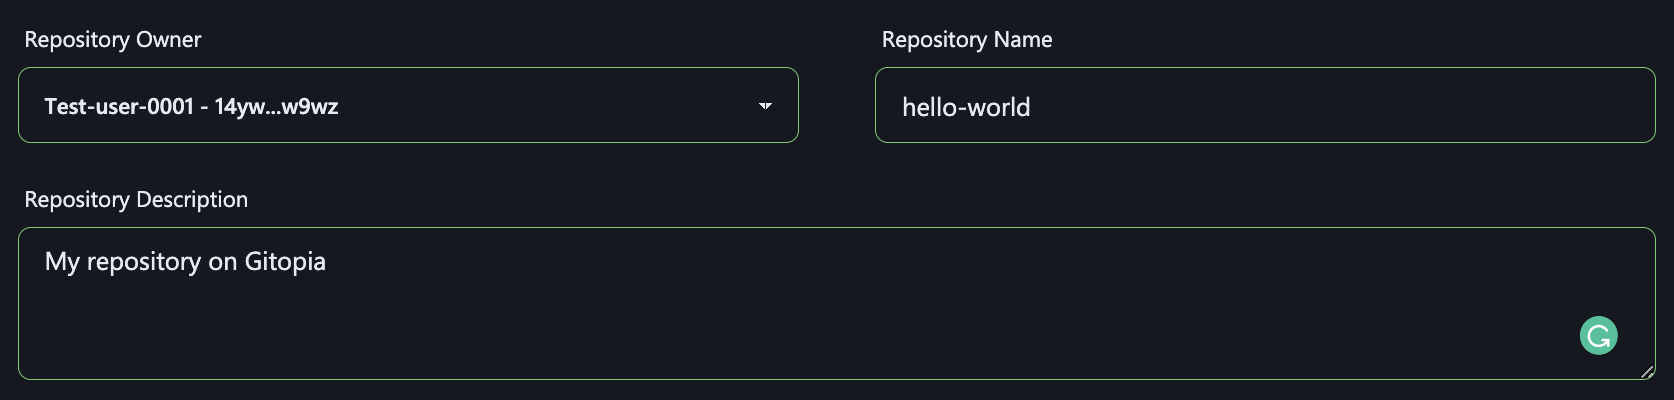
- You will be taken to a new page where you have to enter information such as Repository Owner, Repository Name and Repository Description.
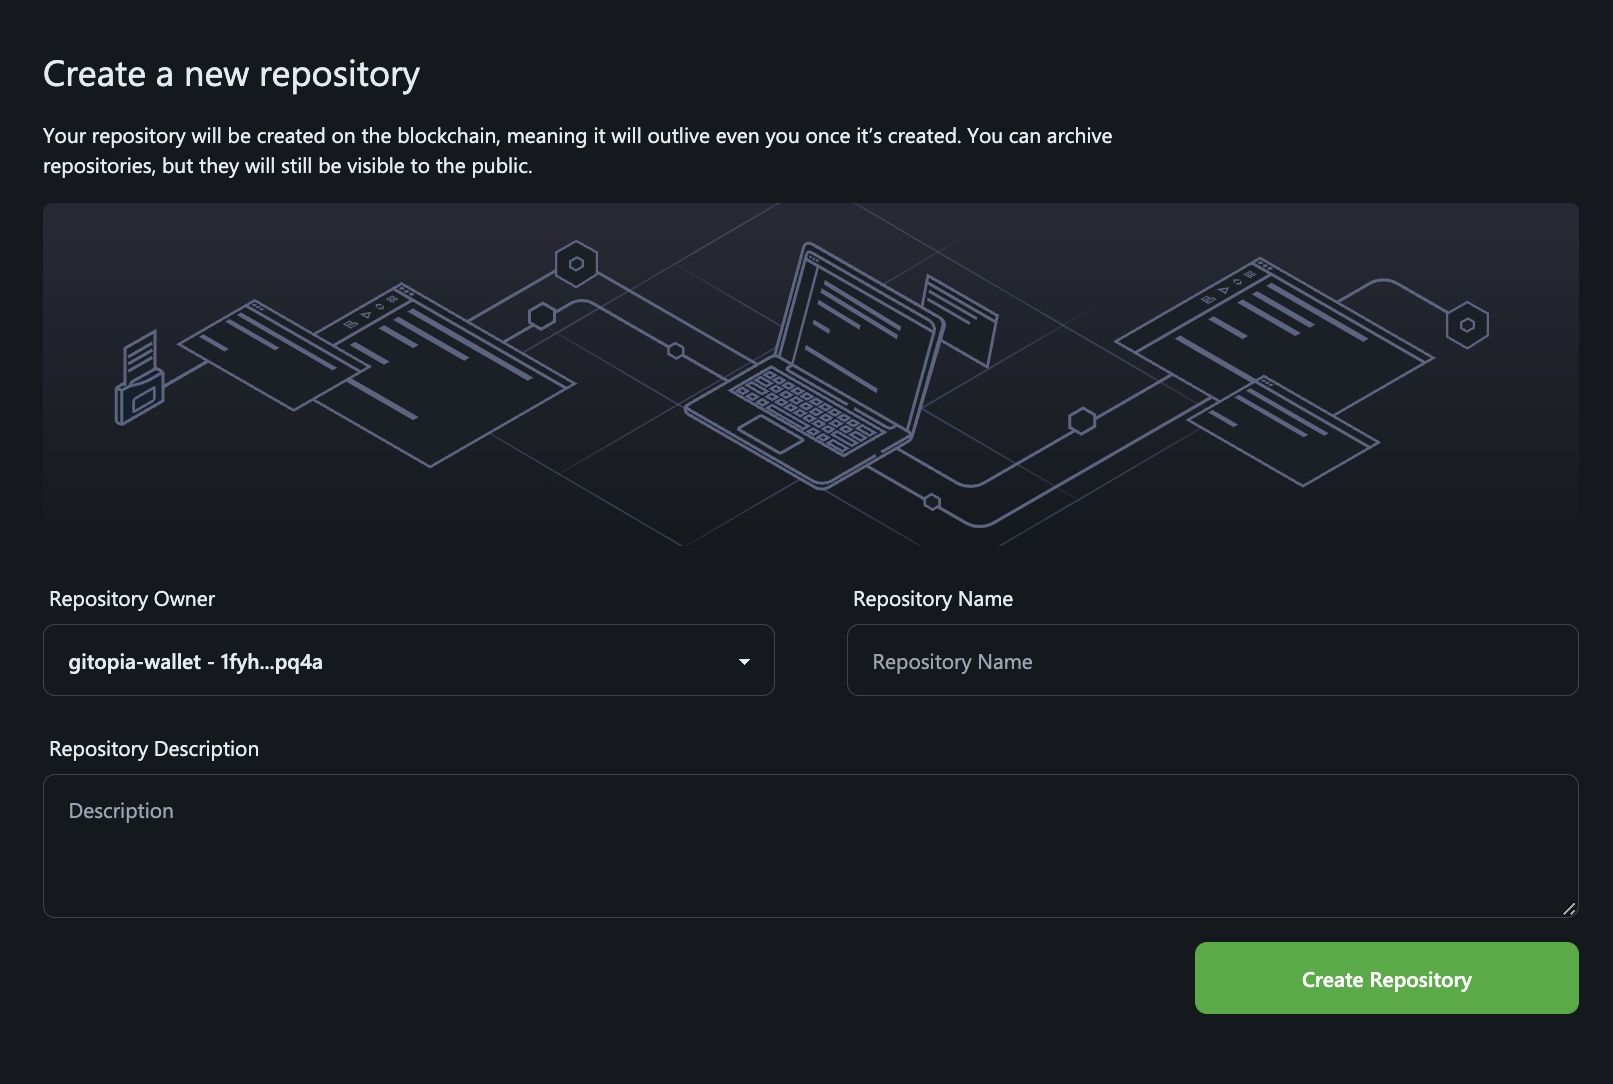
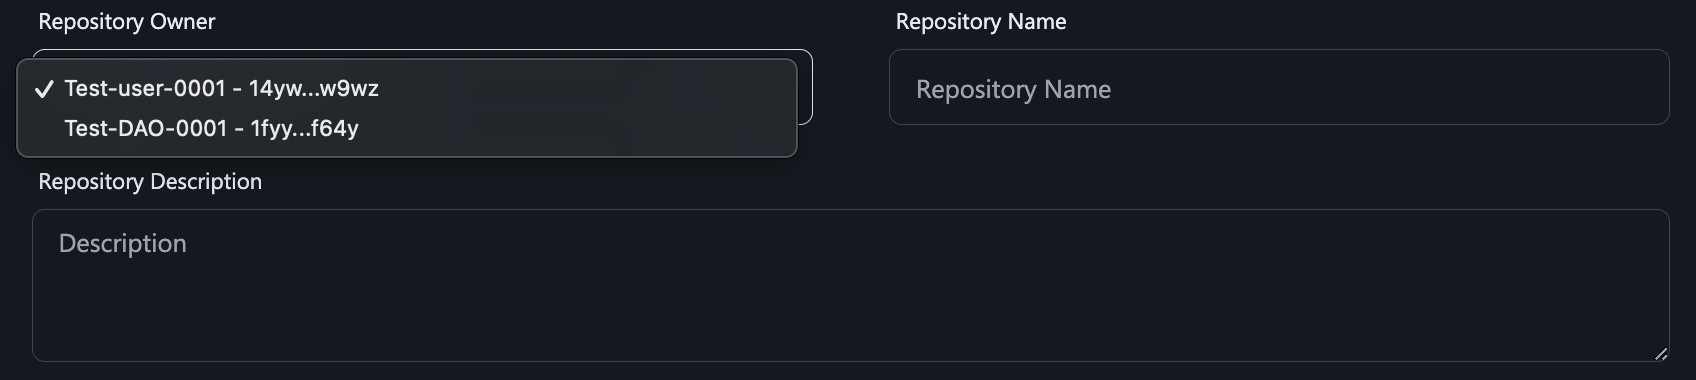
- In the Repository Owner drop-down, you can select the account or the DAO you wish to create the repository on.
- Type a short name for your repository in the Repository Name field and, optionally, add a brief description of the repository in the Repository Description field, as shown in the image below.
- Once done, click on Create Repository icon to create your new hosted repository on Gitopia.
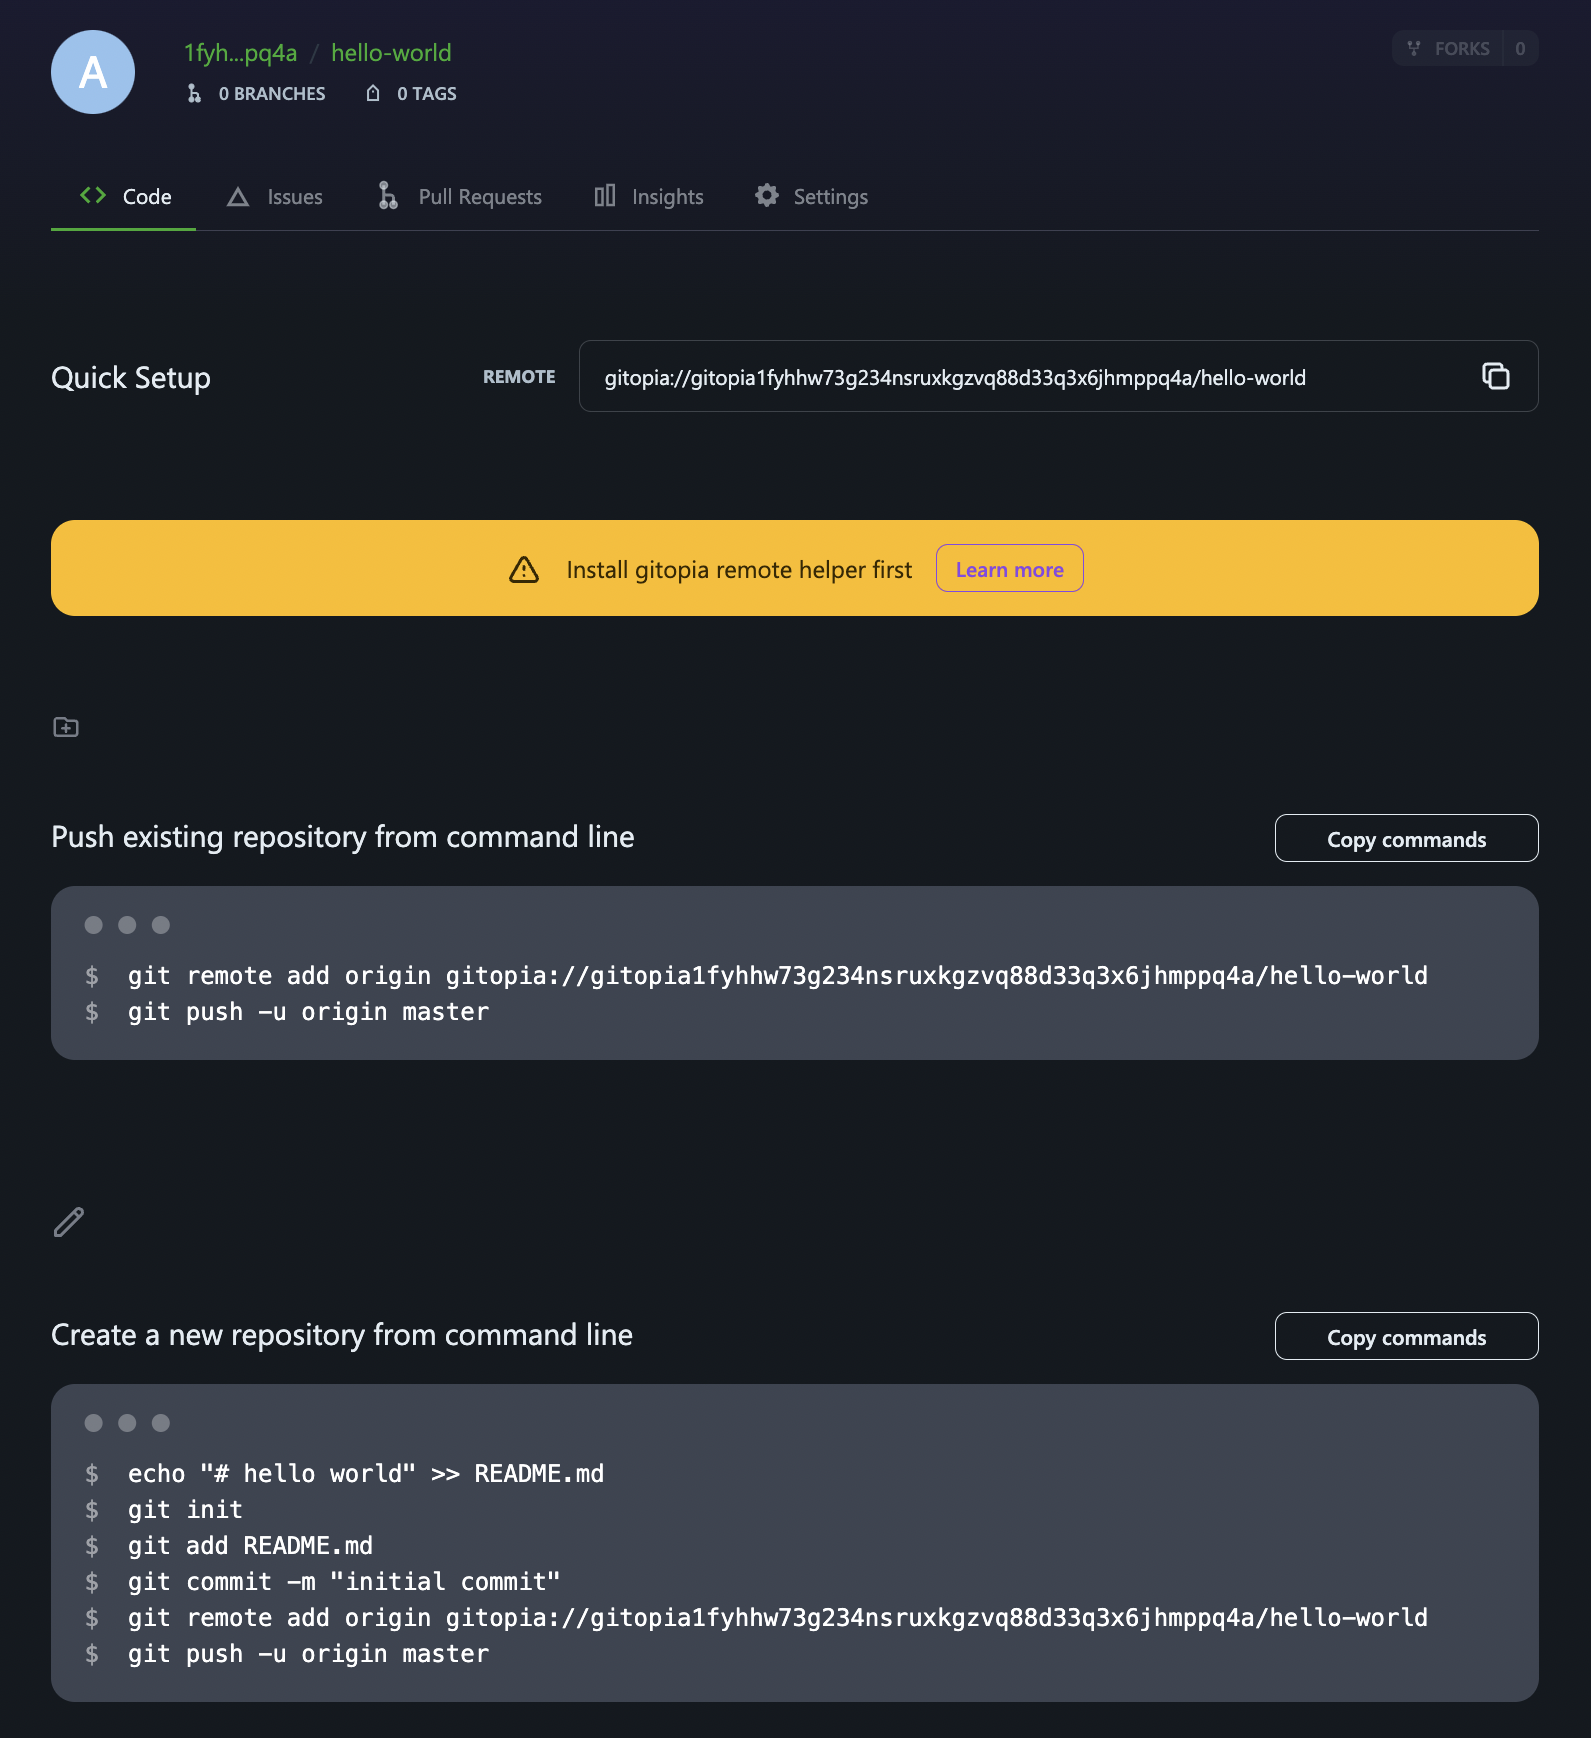
Step 5: Get Started on Your Project
On the resulting New Repository page, copy the commands shown to get started on your project.
Make sure to Install git-remote-gitopia helper so that your git command line can understand gitopia:// transport.