Adding Collaborators to the Repository
Even though all the repositories on Gitopia are public and accessible to everyone, not everyone has the permission to push code into your repository. Other users have a read-only access and cannot modify the repository. In order to allow other individuals to make changes to your repository, you need to add them as collaborators in your repository.
Step 1: Obtain the Wallet Address
Ask the wallet address of the person you want as a collaborator in your repository. If they don't have a wallet yet, they can create a wallet easily by following this Guide.
Sample Wallet Address - gitopia1pjjt5xxx7exxzystxa2jscn56lwwxxxxwe5d0x
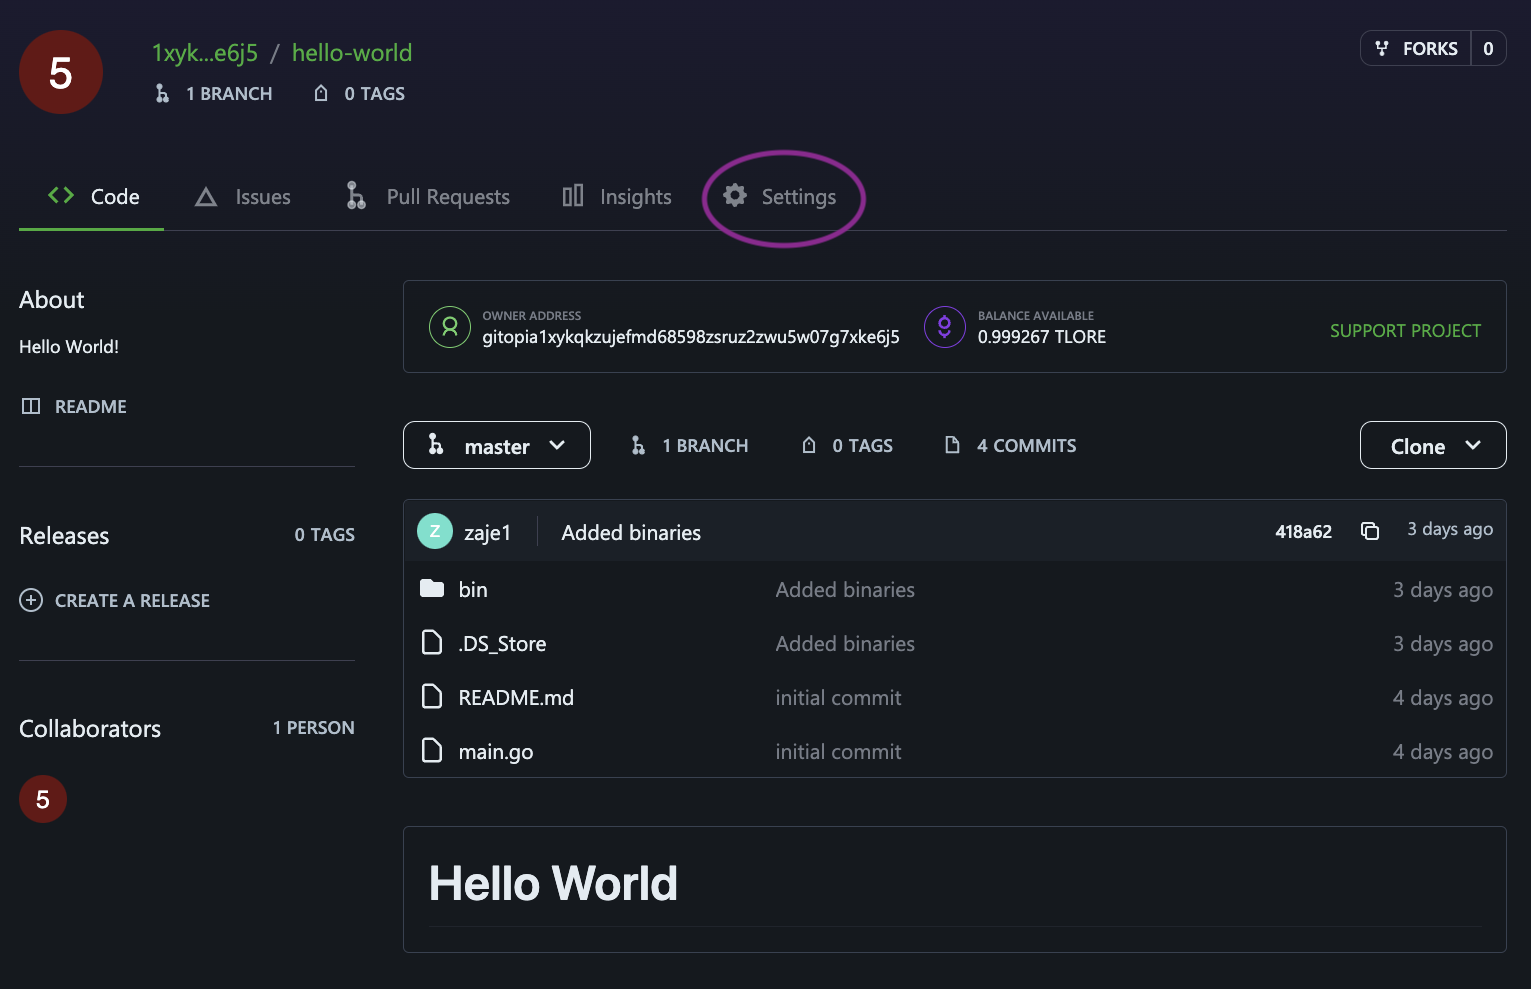
Step 2: Go to Repository Settings
Navigate to the main page of your repository and click on Settings under the repository name.
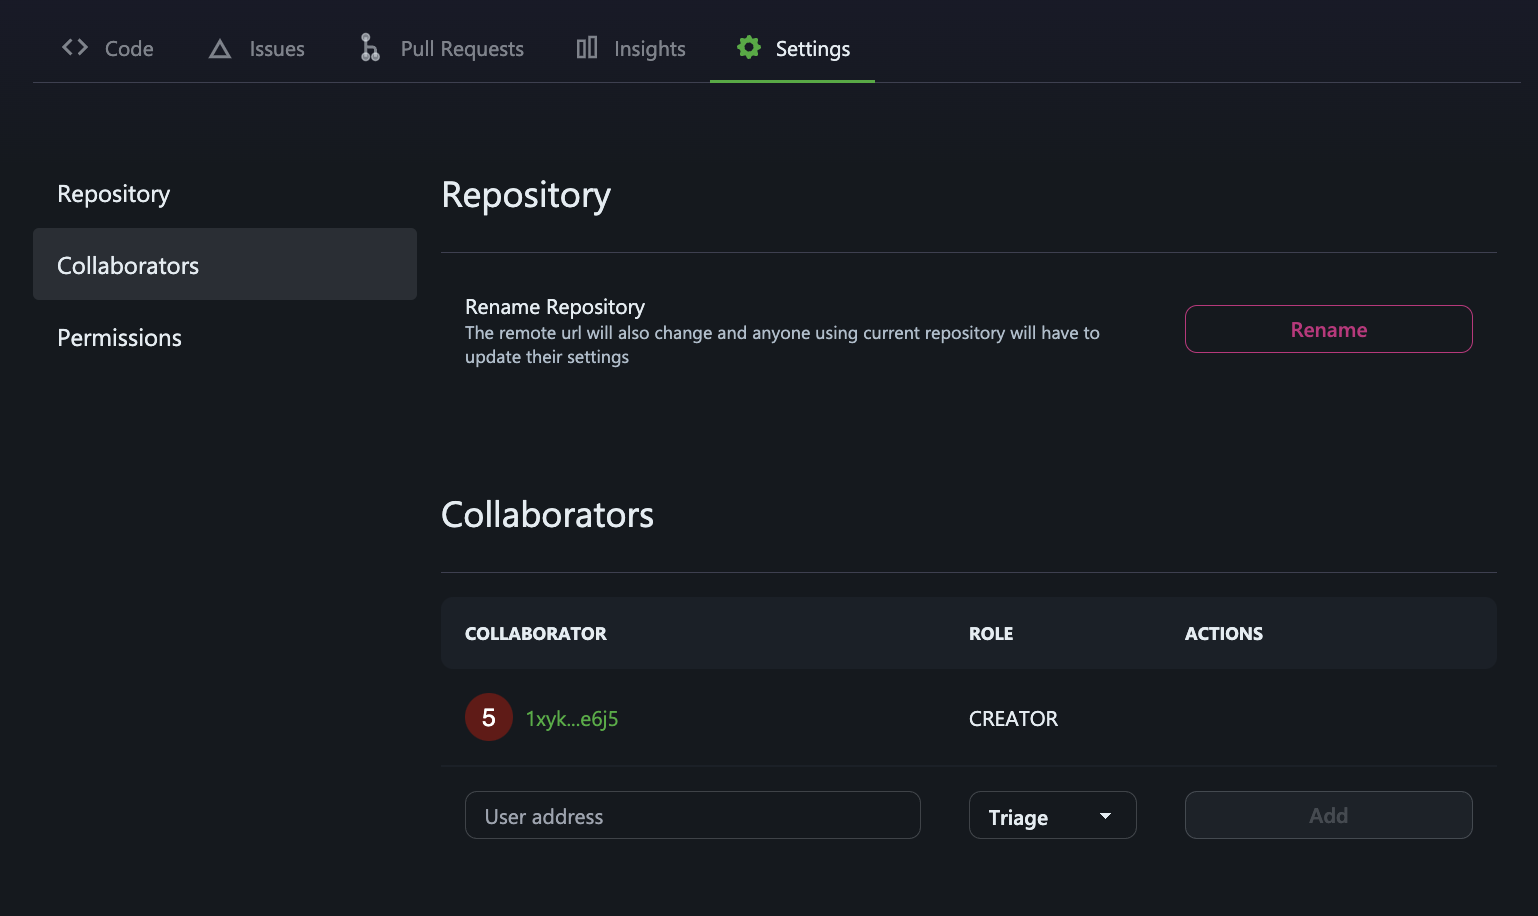
Step 3: Access Collaborators Section
Navigate to the Collaborators section of the repository settings.
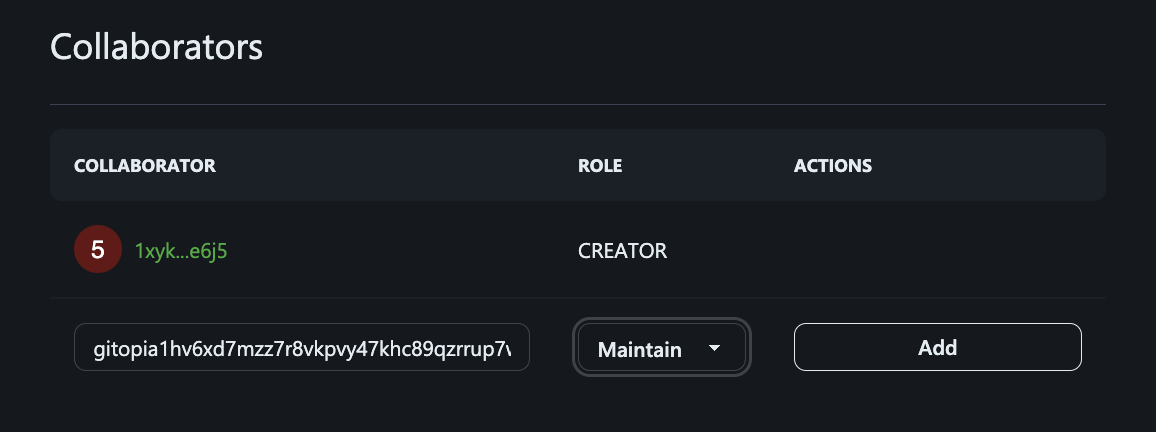
Step 4: Enter the User Address and Role
Fill the User address as shown and choose role of the collaborator.
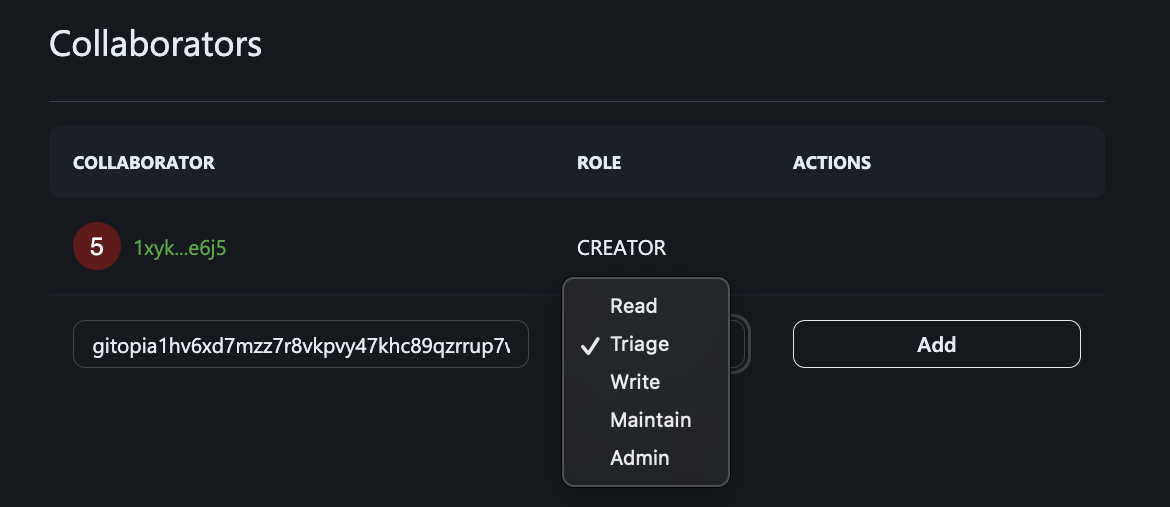
From least access to most access, the roles for a repository on Gitopia are:
Read: Recommended for contributors who just want to view or discuss your project.
Triage: Recommended for contributors who need to proactively manage issues and pull requests without write access.
Write: Recommended for contributors who actively push to your project.
Maintain: Recommended for project maintainers who need to manage the repository without access to sensitive or destructive actions.
Admin: Recommended for people who need full access to the project, including sensitive and destructive actions like managing security or deleting a repository.
Permissions for each role

Step 5: Add Collaborator
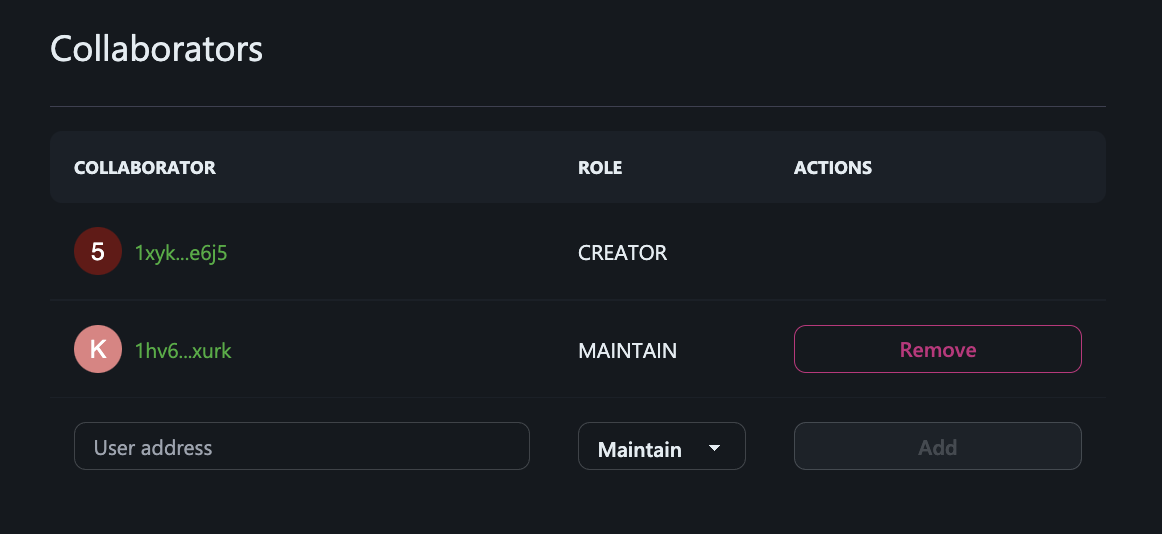
Click on Add to add the collaborator to your repository.
The new collaborator can now access your repository as per his assigned role.